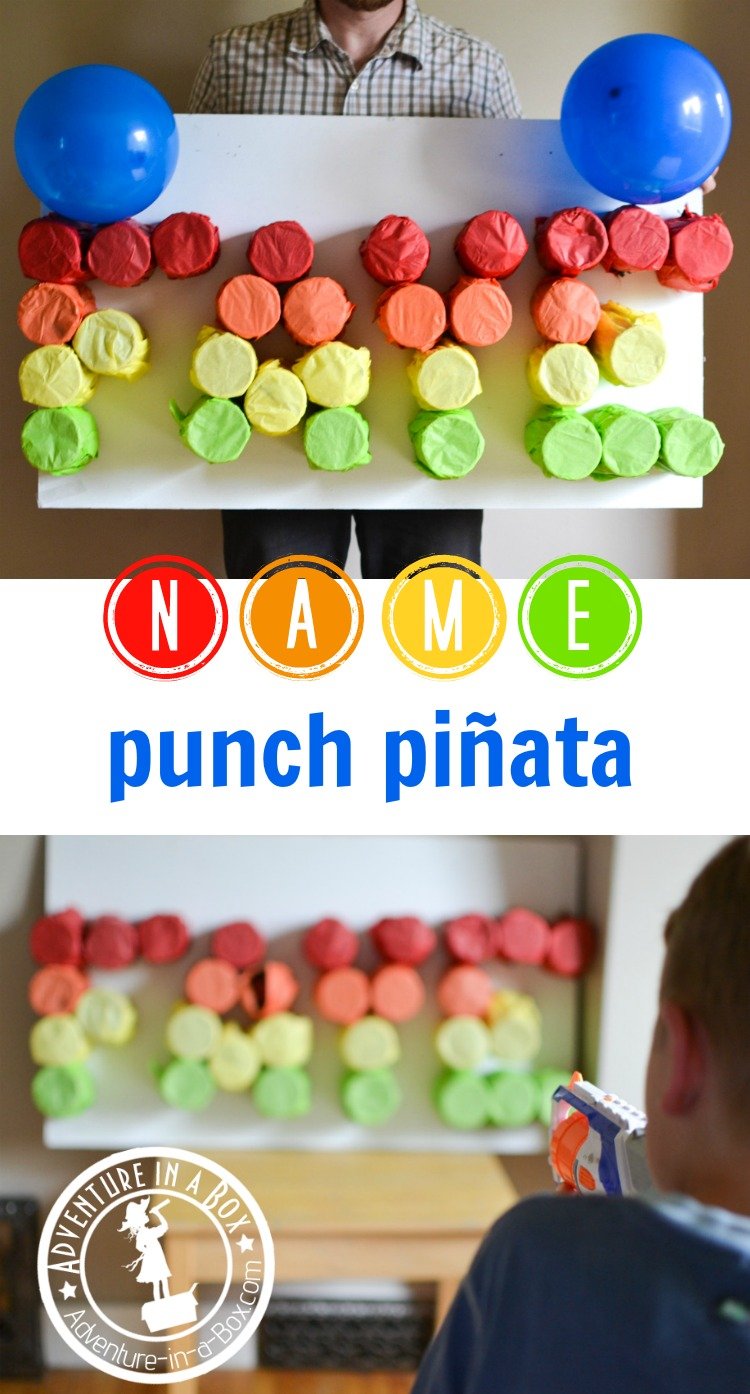
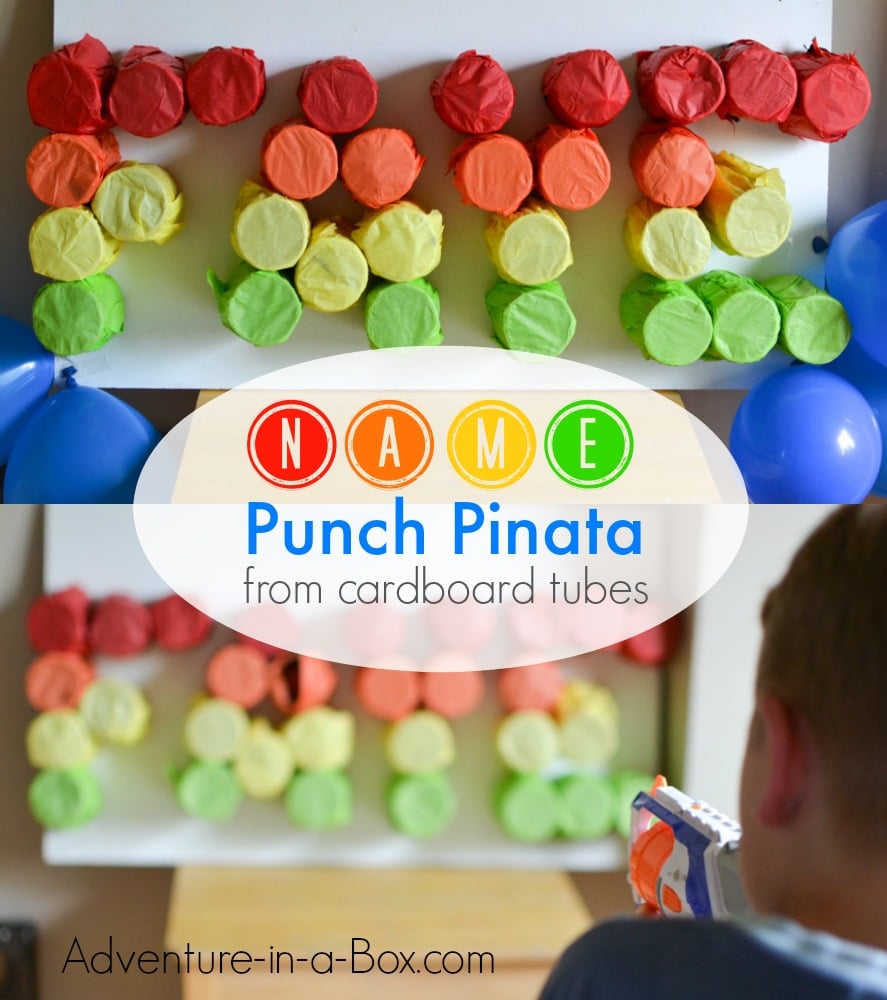
Having an ABC birthday party or celebrating the first birthday? Make this simple name punch pinata from cardboard rolls and spell the birthday kid’s name!
Our little Faye turned one last week. The date called for celebration! Now, there used to be a time when planning a party included decorating the room, making a three-tiered cake, inventing a two or three games and packaging party favours… I used to overdo it a bit, but enjoyed the process!
Since the kids came onto the stage and learned to walk, however, most of the party preparation includes racing against dirt being tracked in from the garden and LEGO pieces piled in artistic disarray all over the floor. In between, we squeeze some salad cutting and a simple cake. If, after that, there is a little time left, we add our special party making ingredient into the mix!
The tradition started the first year my husband and I celebrated birthdays together, quite a while back now. When I asked him what kind of present he’d like, he said, “Not exactly a present, but I always wanted to have a pinata for my birthday.” I hadn’t heard of them before, so he explained what it was and suggested that he could make one for me. I cannot remember what pinata I made for him that year, but remember the amazing golden mammoth I got from him!
Since then, we’ve been keeping the tradition up,,,
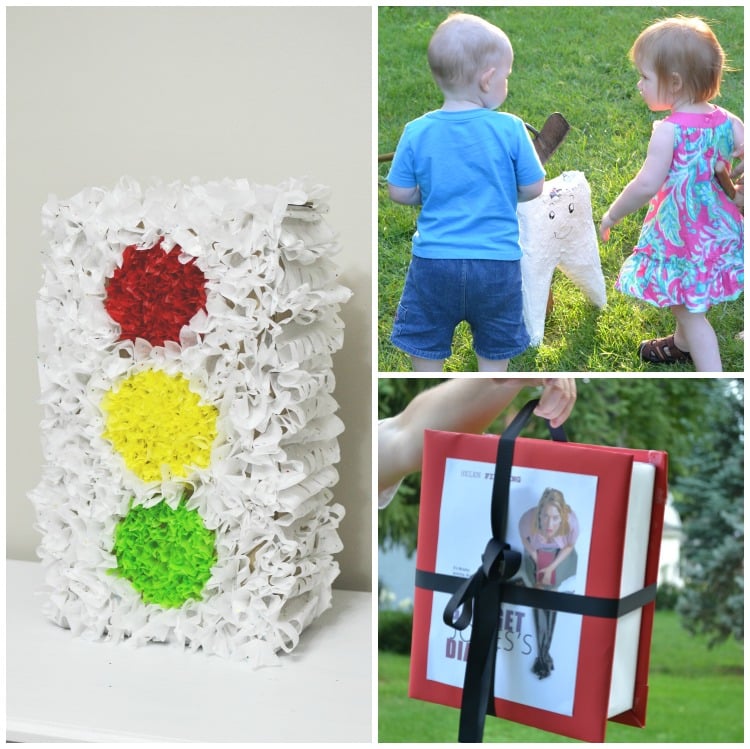
Some of our pinatas are made from tissue paper and some are left unfinished, some are smothered in plaster and some are just cardboard. Here are a few of them from the family photo archive: a stop light pinata we made for Anselm’s 3.5 birthday party and a tooth he got for his 1.5 birthday party. Since his actual birthday is in December, right before Christmas, we often celebrate his half-birthday – mainly so that he could have a pinata to break outside. In the last photo is a pinata I made for Jeffrey when we had a book-themed party on his birthday one year. Let me tell you, he isn’t a big fan of Bridget Jones’ Diaries. :-)
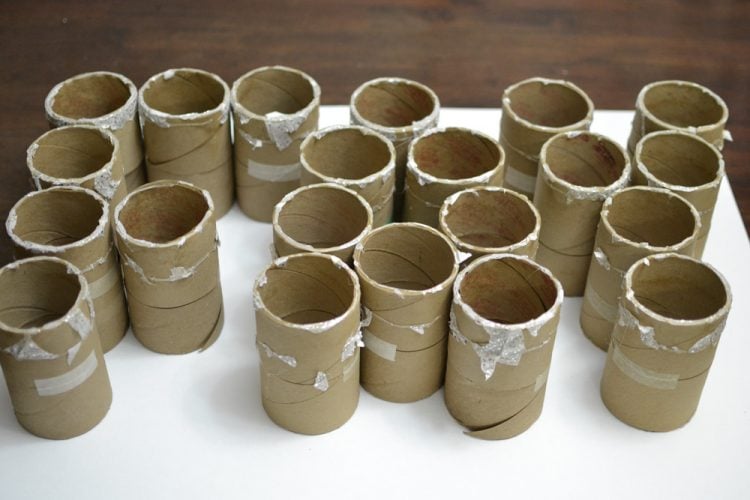
We had yet to try making a punch pinata, and I thought it’d be fun. I just never had enough cups or tissue paper on hand. But a month ago, we got a big package of cardboard rolls from my sister-in-law. She used them for making an amazing gigantic pinata, with layer upon layer of rolls. I inherited it after she decided not to keep it any longer, but wasn’t sure I could fill all of the rolls with goodies. An evening before the birthday party, I had an inspiration how I could use some of them and make a simple and quick name pinata for Faye.
Materials for Making a Name Pinata
- lots of cardboard rolls (toilet paper rolls, paper towel rolls or cardboard tubes cut into smaller rolls) – I used exactly 30
- tissue paper in preferred colours
- glue stick
- hot glue gun
- big piece of cardboard or plywood to mount the pinata on
How to Make a Name Pinata
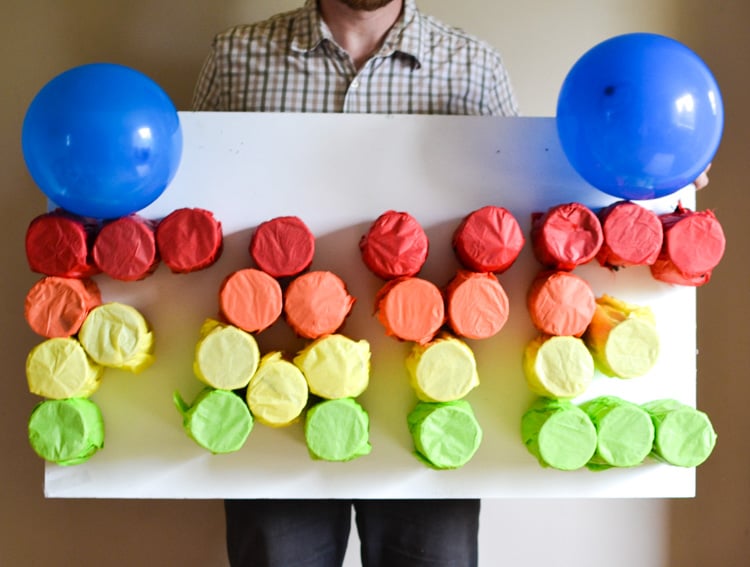
Assemble the rolls into the letters of a name. Here you can see the beginning of our daughter’s name. I started the project with a bit of trepidation, considering my time constraint, and silently chastised myself for not giving her the shorter version of her name – “Fay.” . But once I got the hang of it, I made the pinata in about an hour. I used 30 rolls for four letters, each four rolls tall.
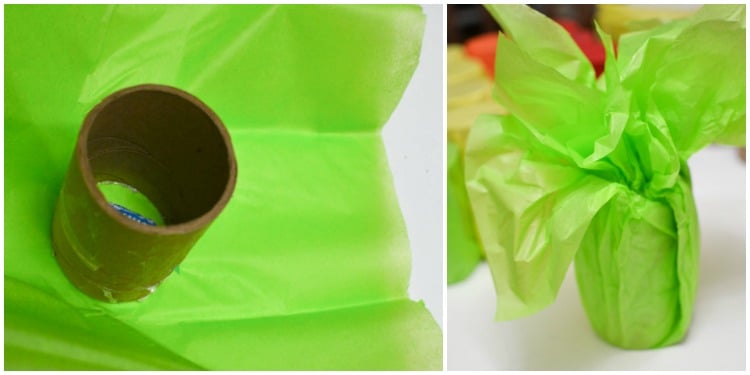
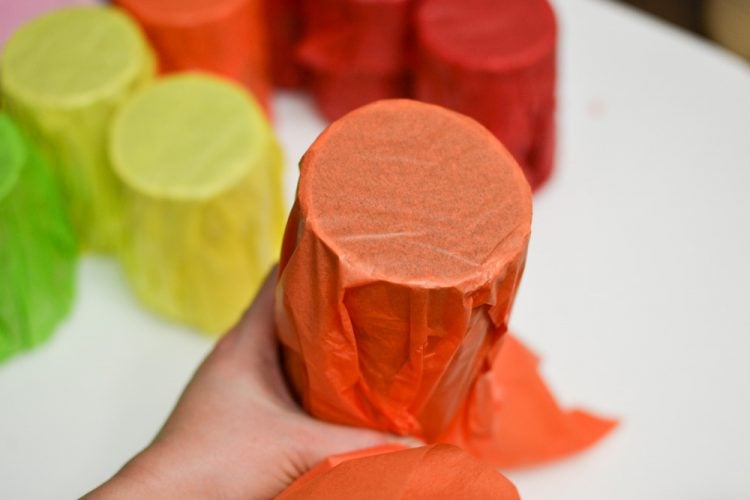
Smother the sides of the roll in glue, using a glue stick. Take a piece of tissue paper, and set the roll in the middle of it. Drop a candy or a toy inside, then gather the tissue paper around the roll, pressing firmly and smoothing the sides, so that the paper sticks to the glue.
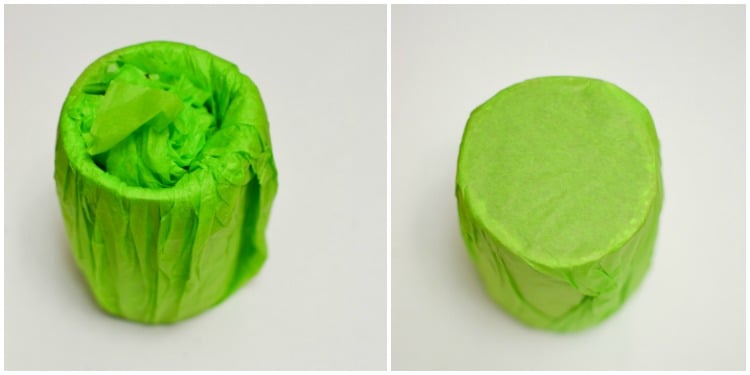
Take the excess from the back, and tuck it inside the roll. It will provide a suitable backing, so that the present inside wouldn’t fall out. Turn the roll over. The other side is tight and smooth. Ready to be punched!
As I was making the rolls, I assembled them in letters, and once I had enough, I plugged in my glue gun . While it was heating, we brought in a scrap piece of plywood to mount the letters on.
I squeezed hot glue onto the edges at the back of the roll, then pressed the rolls firmly down onto the board.
This is the name pinata finished! Faye had to crust test it minutes after we set it up. Three cardboard rolls fell off at that point, which wasn’t as bad as I feared. I fixed them and put the pinata out of reach.
Until the fun started!
Breaking the Pinata
Surprisingly, not that easy!
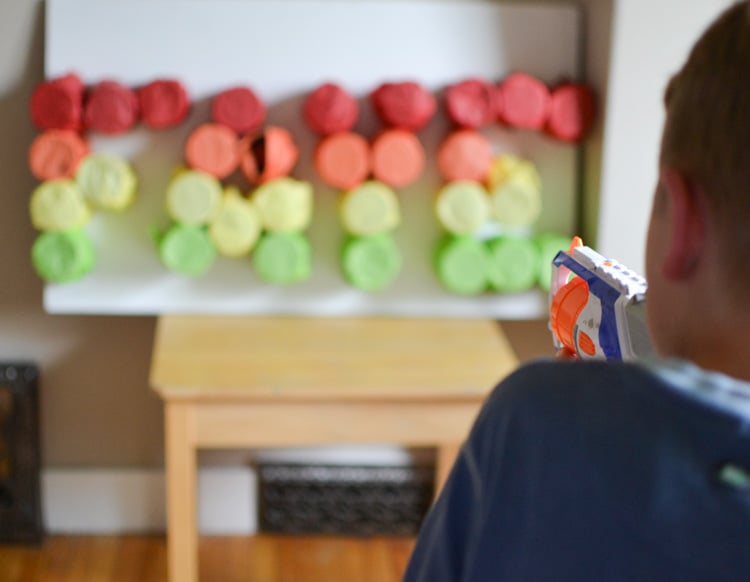
We set the pinata on a low table and started off with NERF guns. Considering that it was sometimes possible to accidentally tear the tissue paper while smoothing it down, I was surprised that the boys who kept firing at it only broke two paper rolls after they each had several tries.
Most of the time, the foam bullets defied physics and missed the tubes altogether. A few times, they did rip the paper open, but a couple times they just bounced back. It was still fun, but we had twenty eight rolls with little gifts inside. Things needed speeding up!
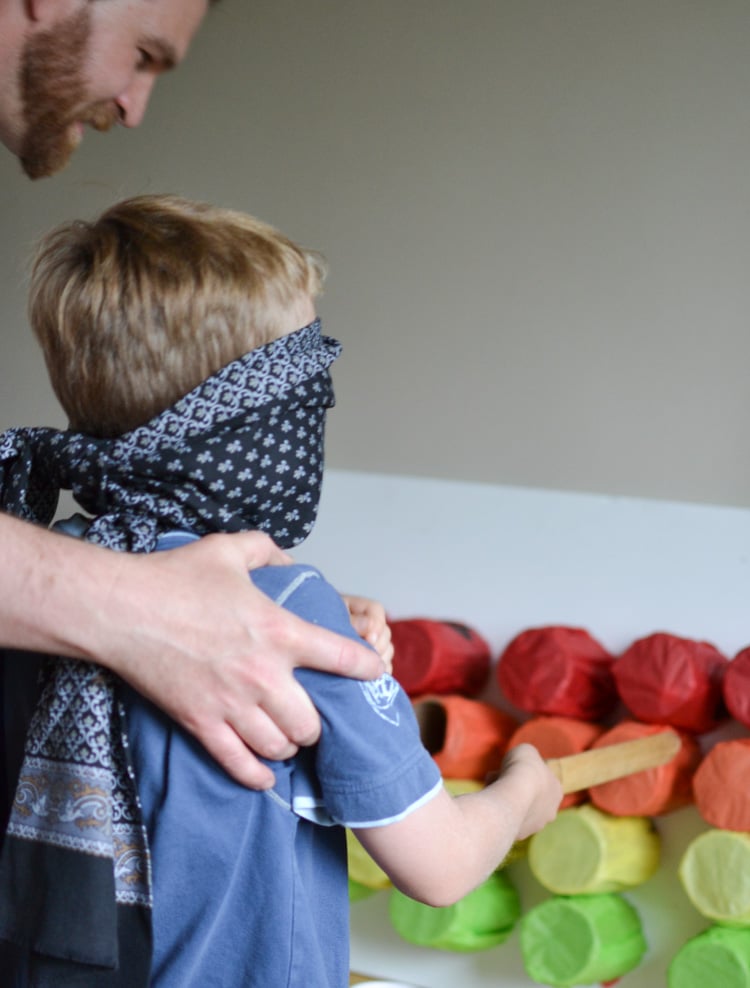
We decided to blindfold our guests and give them a wooden sword to poke the pinata with. Now, things got a lot speedier! It may have seemed too easy if we had stated that way from the very beginning, but after the kids had been attempting to break the pinata for a while, it seemed like a well-earned victory!
As far as fun went, I think it was one of the most successful pinatas we’ve had! Also, one of the easiest to make. I’m now debating with myself whether to keep the rolls or finally recycle them, after they had serve for two pinatas so well.