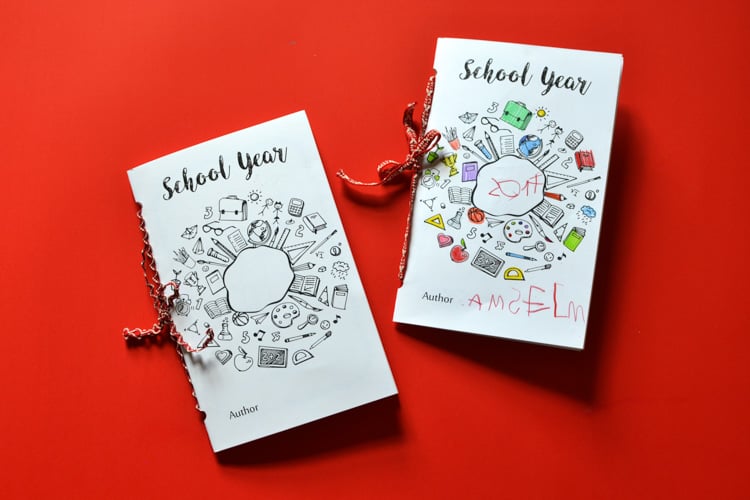
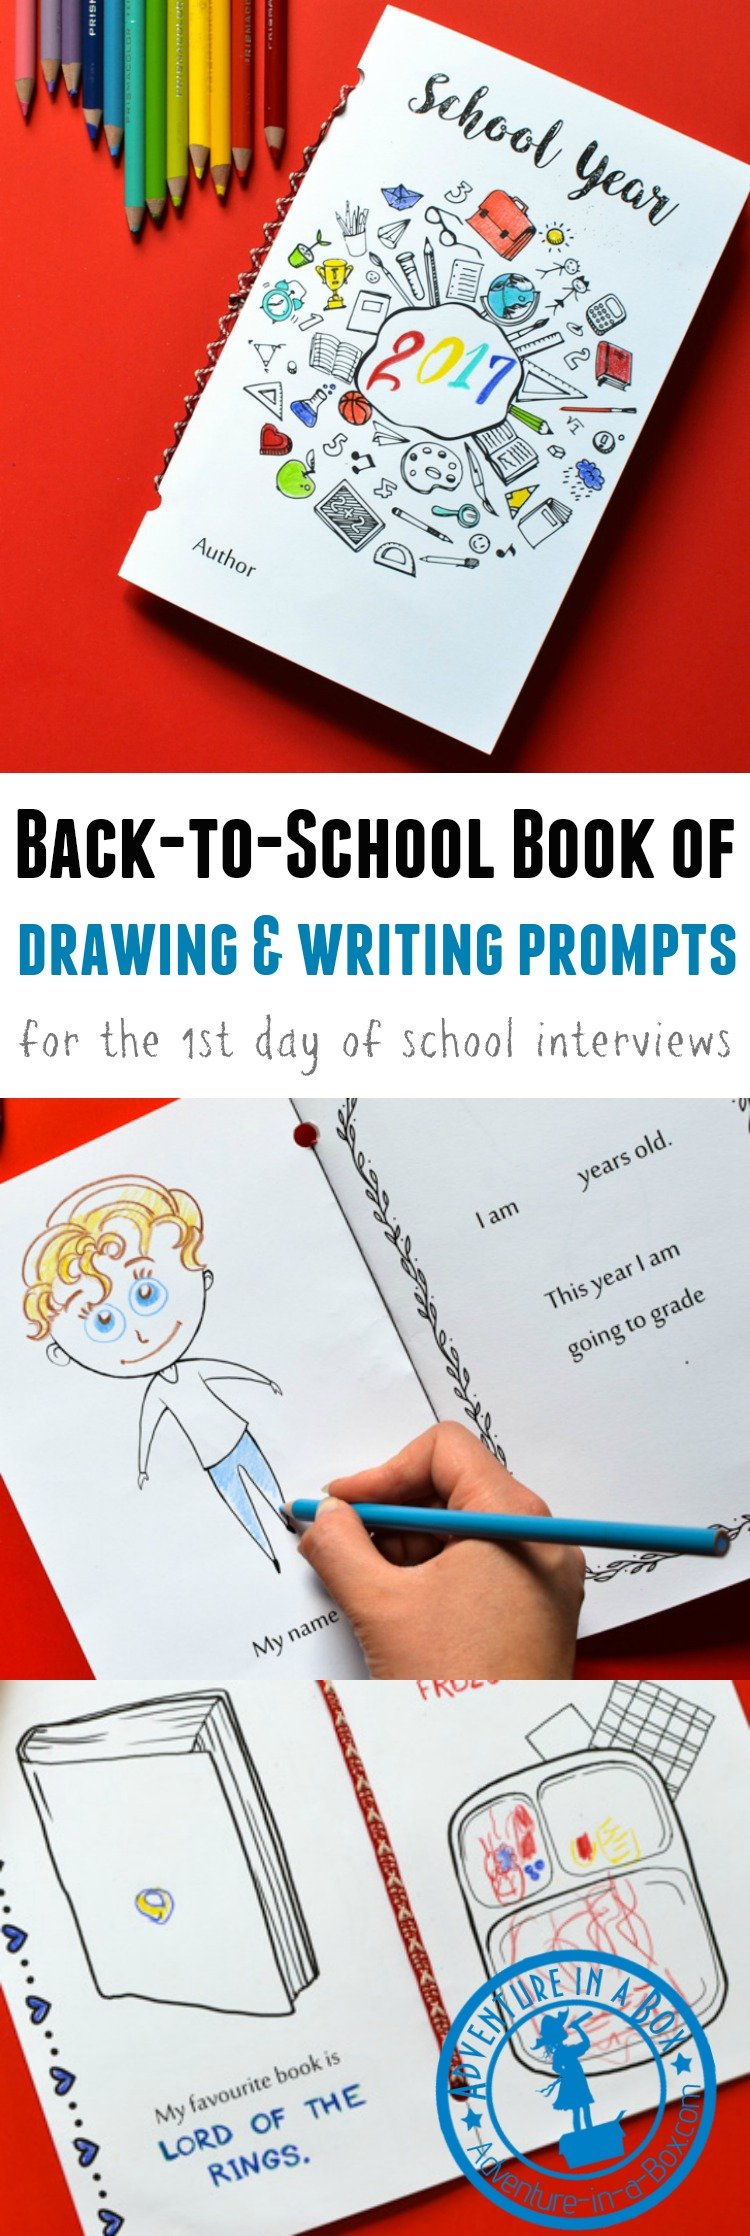
As a first-day-of-school tradition, make this free printable back-to-school book together with kids! Filled with writing and drawing prompts, it captures their likes, dislikes, hobbies, and aspirations. A fun keepsake for parents and a creative way for teachers to get to know their students on the first day of school.
The beginning of each school year is one of those milestones that makes you stop and ponder over all the changes that happened over the last year, as well as the general passing of time. I remember doing it as a child, though maybe not so philosophically, and this year my oldest has reached school age, so I will be starting my reminiscing as a parent. I bet it will be more teary and sentimental this way!
It is true, though, that the beginning of a school year is an ideal time for creating a little time capsule of how things are at the moment, so that next year you can have a tangible keepsake to look at. Photographs are great that way! I love seeing all the photos of my friends’ children on their first day of school, especially since many of them post photos from previous years for comparison as well. It’s fun to see children grow and change. However, since photography hasn’t yet found a way to capture the changes that occur inside, some families also have a tradition of holding a back-to-school interview, where they ask their children a set of repeated questions. I love reading those even more!
As the proud mom of a four-year-old boy, I wanted to start doing this with him. And since separate pieces of paper have a way of escaping on me, I put together a book of writing and drawing prompts for him to fill in. He loved that he could write a book of his own!
There are many other great back-to-school crafts you can try (The Primary Parade has collected 26 of them!).
Book Creating for Kids
Filling in a list of questions seems a little like homework, but making a whole book…
Well, there is something grand about it!
At least my son was very proud to show his work to his grandma, while remarking, “This is the book I’ve made.” Then he put it on the shelf, next to all the other books we have. It gave him a real sense of accomplishment.

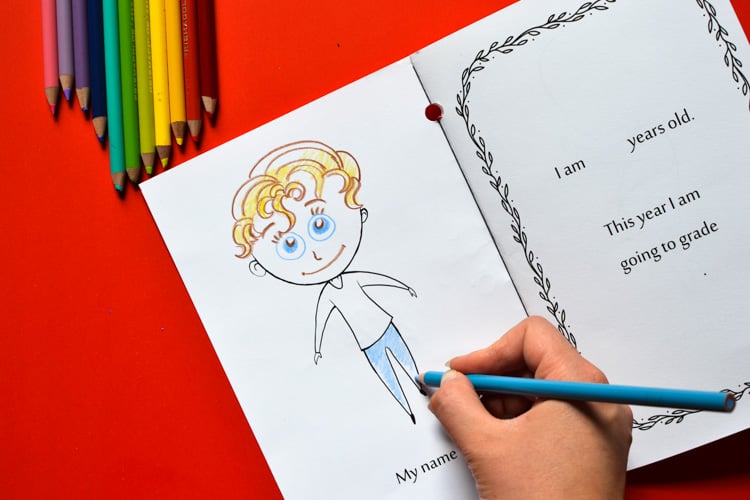
Besides the text, each real book has illustrations of course, and this is an important part of the book! There are lots of elements to colour as well as drawing prompts to inspire children to draw self-portraits and design a book cover for their favourite book. My son surprised me quite a bit when he insisted that his favourite book was Lord of the Rings, but that’s what he has been reading at bedtime with his dad, after finishing The Hobbit. I liked the cover he drew for it! Classic minimalism.
In addition, there is the element of learning about book binding. I suggest a very simple method, but to some kids it can be a start to book production at home.
10 Back-to-School Questions
The questions are formulated in such a way that they can be useful for making the book at home as a family keepsake and at school as a way for elementary teachers to get to know their students on the first day. There is also nothing to prevent homeschoolers from using it!
The questions include:
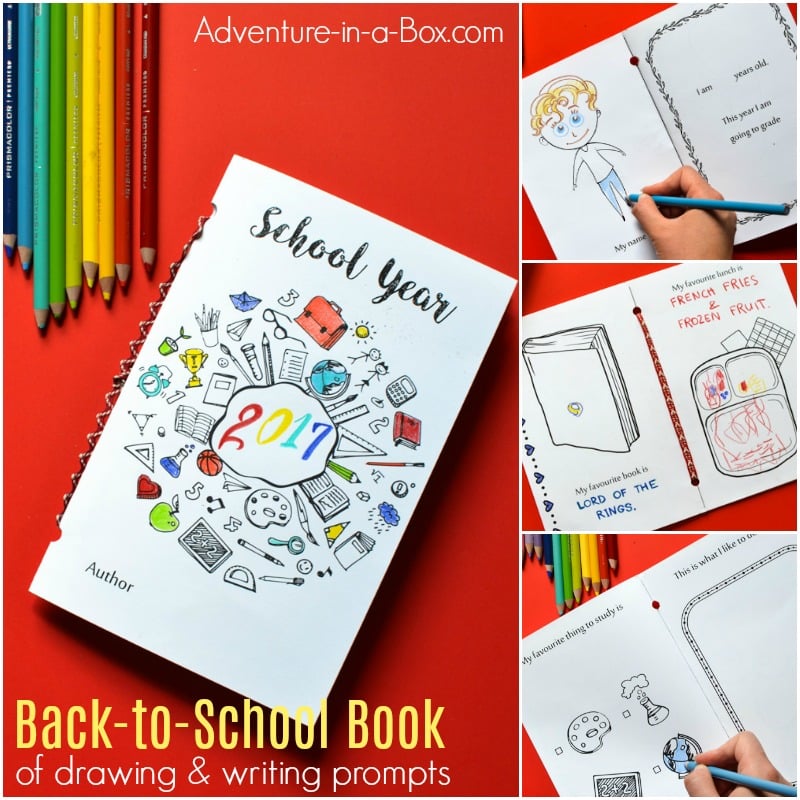
- name, age and grade
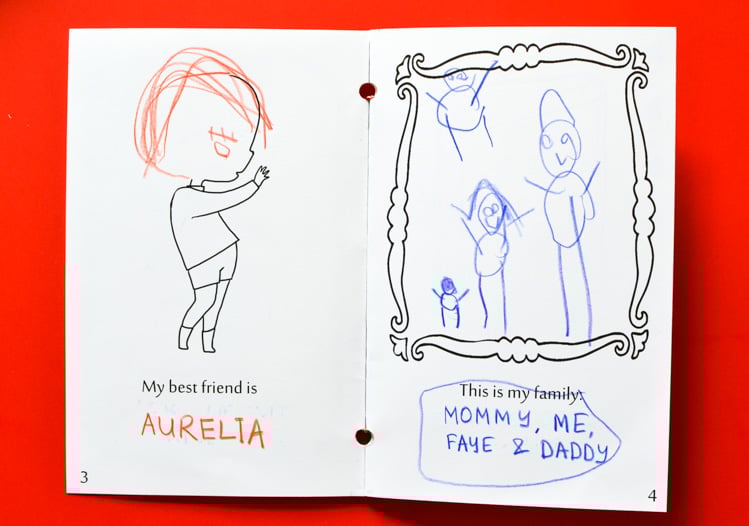
- best friends and family members
- favourite book and favourite lunch
- favourite subject to study and favourite activity
- what kids hope to learn in the upcoming year and what they want to do when they grow up
Along with the questions come ten drawing prompts. Sometimes it’s nothing but a frame, and other times it’s a picture to finish. And for kids who like to colour, there is plenty of room on the pages to do just that!
The book is just long enough to gather answers to several simple and a couple of more profound questions, but still short enough to let kids finish making it within half an hour or less. I think that my son spent about twenty minutes on the book. Being a four-year-old, he drew the pictures and wrote some answers himself, while letting me write down his answers to the others. This will work well for kids who are only starting school.
How to Bind the Book
Good news – you will only need three sheets of paper to create this book! You will also not need to do any cutting to assemble this book. Just print and fold. However, you will need to be careful about how you print – the design is meant for printing on both sides of the paper.
First, print the pages marked “1 & 10”, “3 & 8”, and “5 & 6”. Next, you’ll feed the same pages back into the printer and print on the other side of them. The cover goes on the back of the page “1 & 10”. The page “2 & 9” goes on the back of the page “3 & 8”. The page “4 & 7” goes on the back of the page “5 & 6”. It may seem a little complicated at first, but once I printed one book, it was easy to print another copy.

After all the pages are printed, stack them together, following the numbers at the bottom of each page. Fold the page at the line in the middle. You will receive a 10-page book. Next, punch holes with a hole punch.

Finally, thread a ribbon to bind the pages together.

I suggest using a ribbon and a large hole punch so that children can help with these steps or complete them independently. However, if you don’t have a hole punch, you can use a needle and thread to sew the pages together.

Watch the Video
If you still have questions about assembling the book, take a look at the video below. You can also find out how my son answered all the questions from the video.


What a fantastic idea. Thank you for linking up with my Back to School Resources this year. I have pinned this for when my boys go back in September
Awesome, these wonderful book pages will be going to my little friend Lilli in New Brunswick,Canada. With the help of her Mom I’m sure she’ll have fun starting off the new year with this. I’ll be sure to provide Link so her mom can join, plus will send instructions since the mail isn’t the fastest in Canada. I know I can provide her with the link but I’m going to include afew special pages of my own. Once again thank you