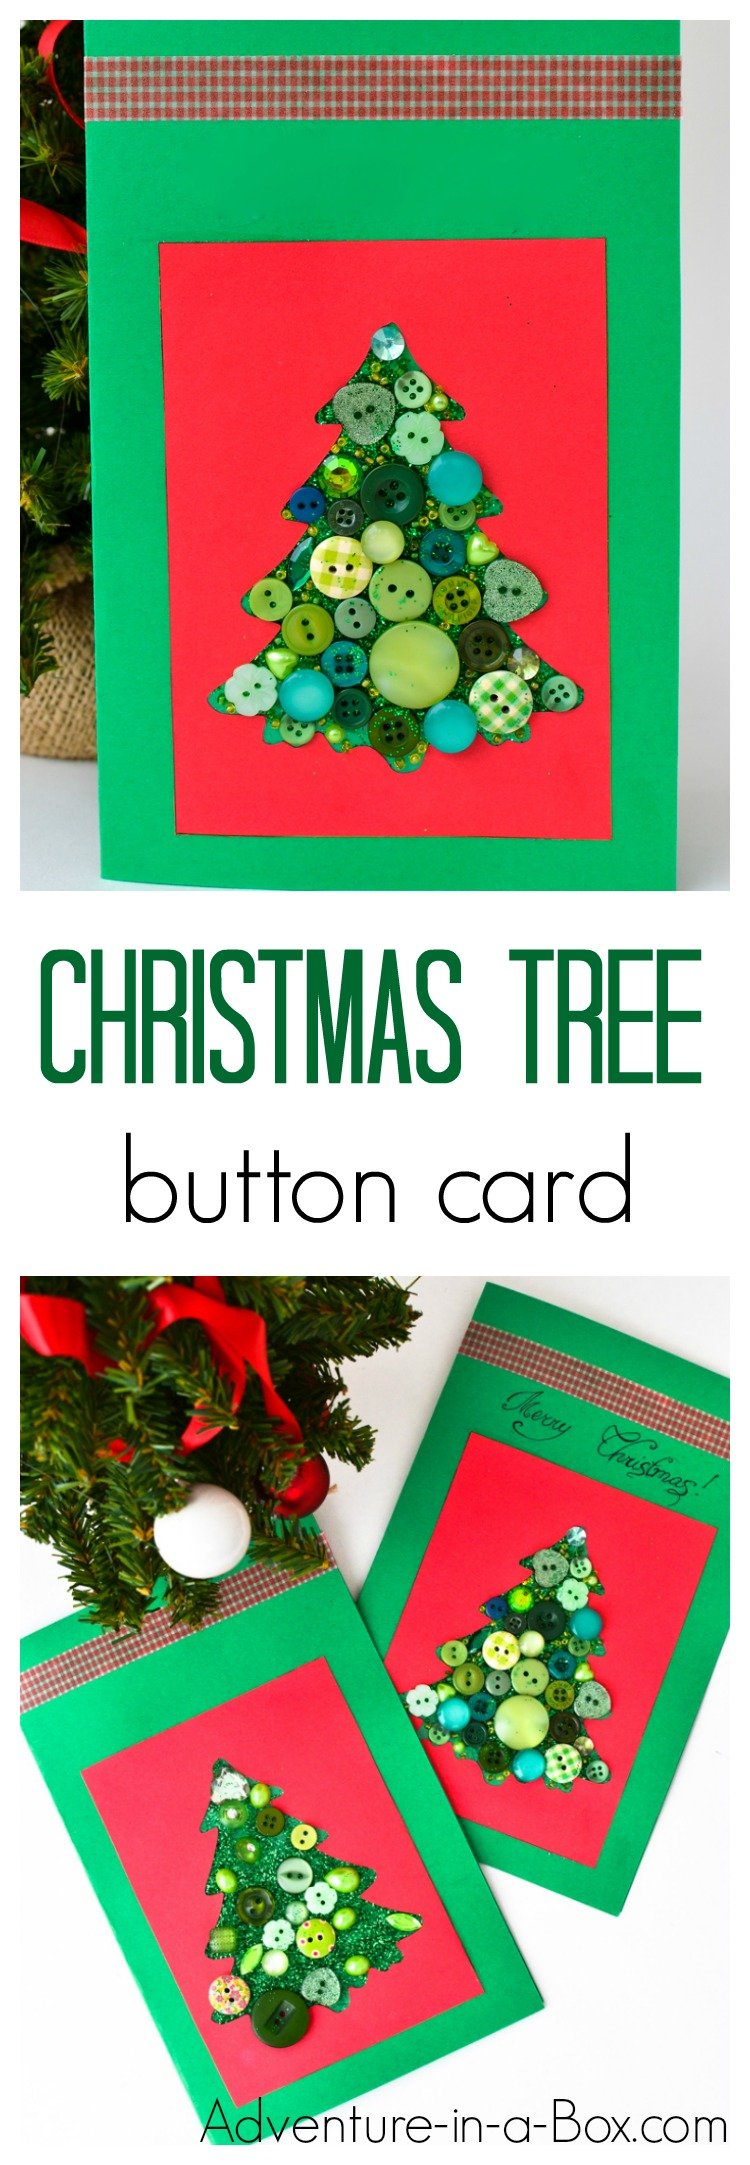
Make a Christmas tree with buttons! This button Christmas card is so easy that even a toddler can make one. 
We have a lot of relatives and friends who live far away, so we like to start working on Christmas cards early to ensure they are delivered in time. Thankfully, this year I have an eager helper. Budster wants to participate in everything we do, and I was looking for a simple card design that we could work on together. We had a lot of fun making button collages this year, so I thought we would try it out for cards.
Toddlers can create gorgeous designs, using buttons, and, as an adult, I find this simple activity entertaining as well. Truth to tell, it is surprisingly relaxing to arrange buttons to fill the cutout shapes, so it is a suitable craft for the whole family, starting with toddlers.
Materials
– Red and green cardstock paper: I use cardstock paper for many projects, so I recently bought Array Card Stock (100 Sheets): it has 10 colours, and each colour comes in 10 sheets. It was very excited when I opened the package and saw all those bright colours that will, in time, turn into cards, invitations and party decorations.
– Green buttons: by now, I have a button collection, but when I feel like I run low on certain colours or want some interesting shapes, I go to a dollar store or buy an assortment online. I have recently bought this package of wooden buttons: Budster used two of them in his card, and I did too.
– White glue
– (optional) Green glitter
– (optional) Christmas-themed Paper Tape
Tutorial

1. Out of the red paper, cut a red rectangle, sized approximately 5 1/2 by 4 inches. Download the template and transfer the design onto the red paper with a pencil. You can certainly make your own design with children if they are up for it! Cut a tree out.
2. Apply strips of packaging tape to the back of the red rectangle so that their sticky surface is exposed in the cutouts
3. Collect buttons and beads in a bowl.
4. Attach them randomly to the sticky surface.
5. Using the glitter is optional, but we used it to cover the spots where there were no buttons.
6. Fold the green paper in halves, and glue the red paper to the front.
7. Use ribbons, coloured tape or anything else to embellish the cards further.

Budster’s card is on the left, and mine is on the right. I was pretty careful at putting my buttons down, side to side, and there was not much place for glitter left when I finished. Budster’s placement was more random, and he is at the age when he likes matching things, so I noticed how he tried to pick similar buttons. He did not want to fill all the space either, and at first the tree looked empty, but after we sprinkled it with glitter and glued to the green back, I found out that I actually prefer his spontaneous tree.
Either way, we both had fun! We may make a couple more of these cards, or we may try something different next.

Do you like to send cards for Christmas?
If you liked this craft, you may be interested in these related articles:
– Magical Christmas Lanterns: turn Mason jars into Christmas illumination
– The Gingerbread Man Shadow Play: cut the puppets with our free printables and stage a shadow play at home
– Make a Christmas Countdown with Wooden Blocks: if you cannot wait until Christmas, start counting days
If you want to stay updated on new stories from Adventure in a Box, consider subscribing to our Facebook, Pinterest,Twitter or Instagram pages. Thank you for reading!


Trackbacks/Pingbacks