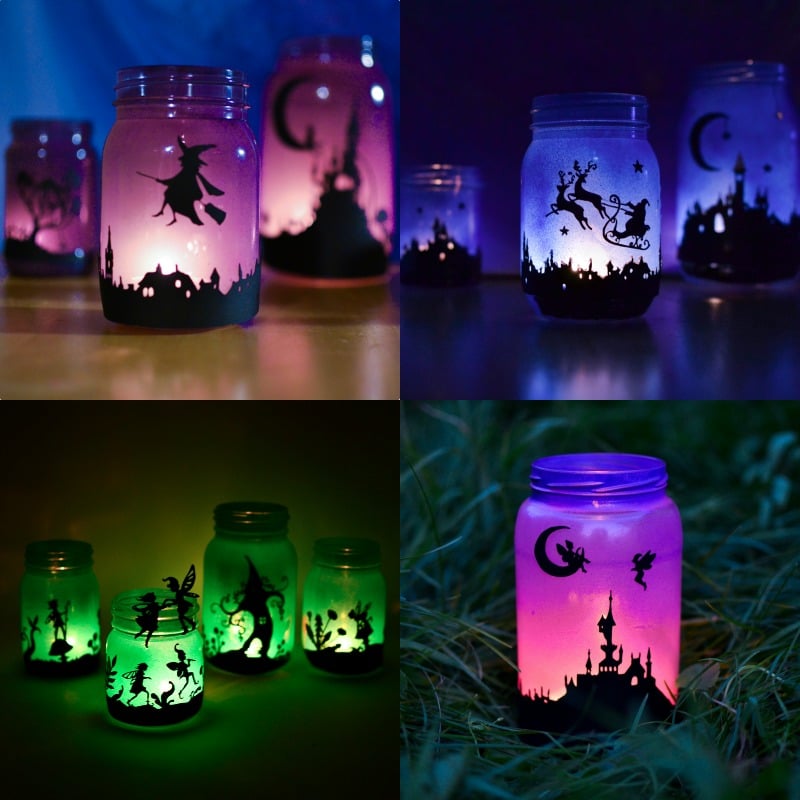
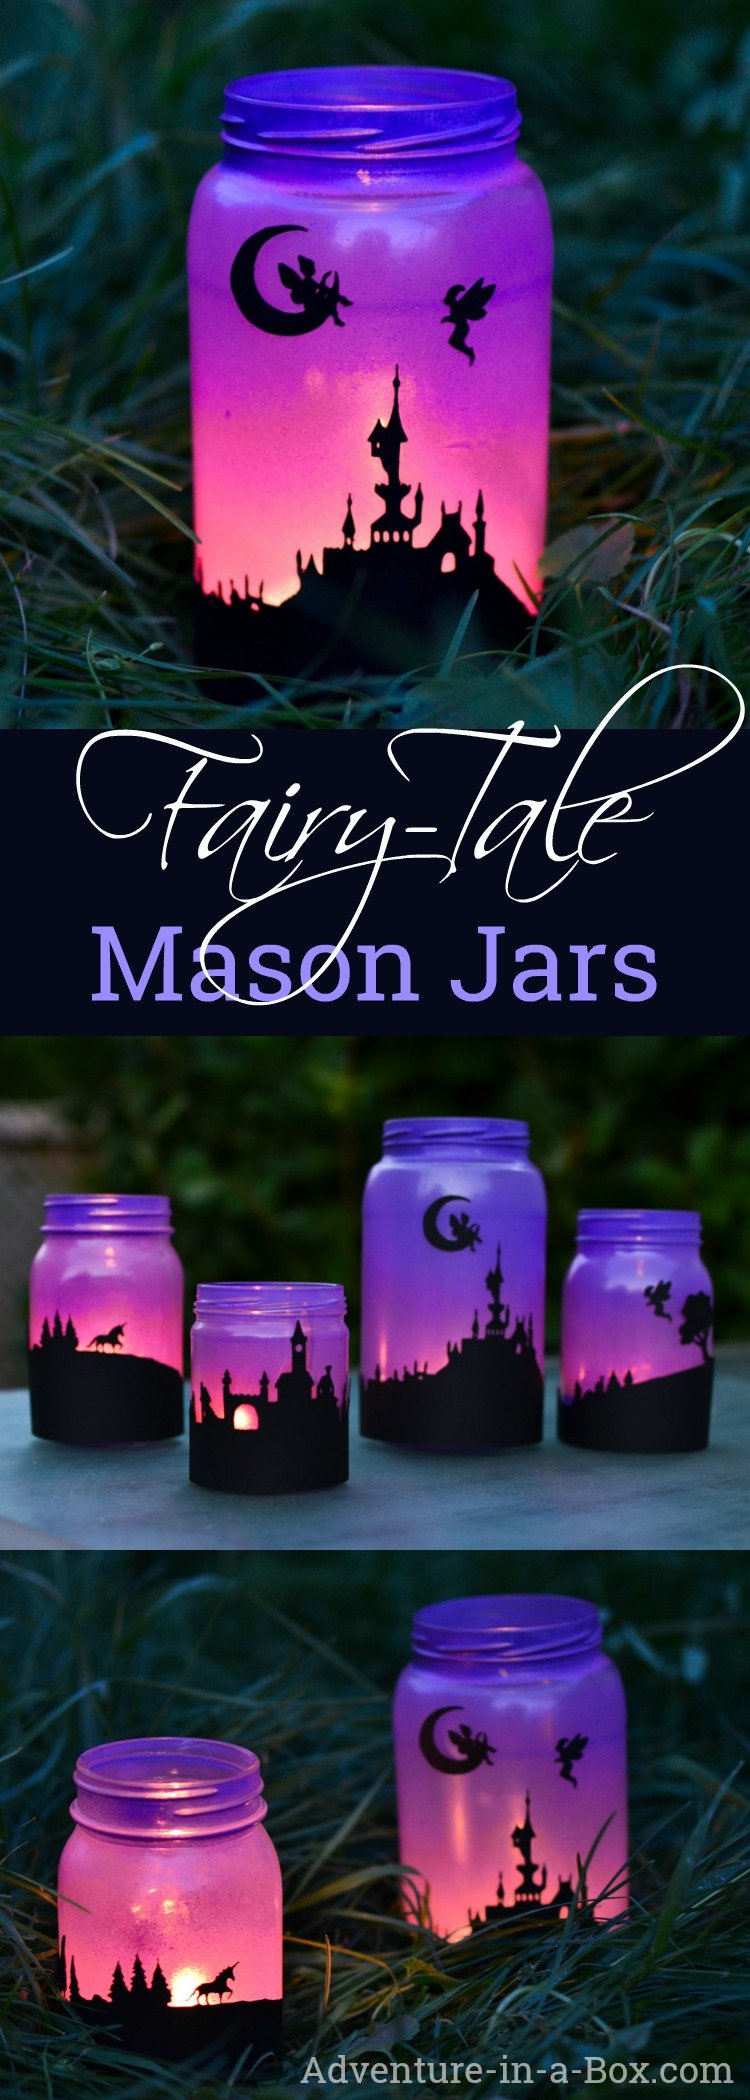
Turn mason jars into a set of fairy-tale lanterns with silhouettes of fairies and unicorns!

Three years ago, I made sets of both Halloween and Christmas lanterns. We have enjoyed them for a while, and have since made a few new designs. Along the way, I’ve been trying to improve and simplify the technique of their construction. My first lanterns used paint markers, but I since noticed the markers varied in quality, and it wasn’t easy to do the designs in a smooth even layer. Cutting the design out of paper was a lot easier, and that’s how the latest fairy lanterns came to life. Our latest project uses a homemade recipe for cheap glass paint. It also comes with a video.
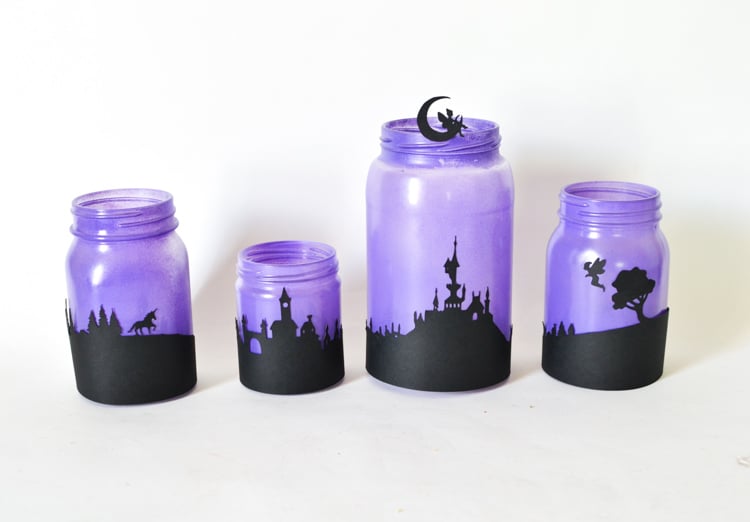
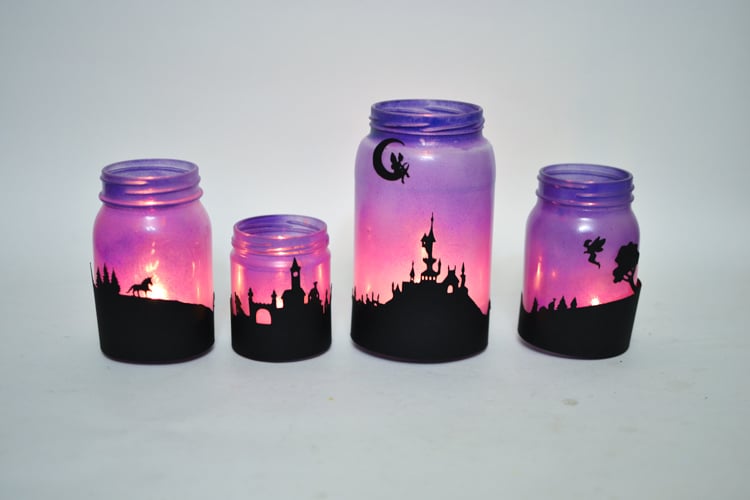
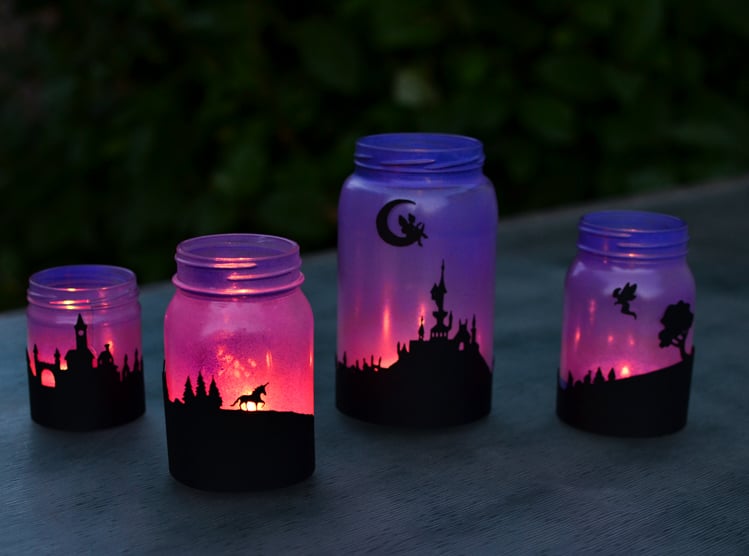
As I continue to receive questions, I decided to shoot a video of making the lanterns. A great opportunity for a new design! This new design also includes fairies, but also a unicorn and a palace that is reminiscent of Cinderella’s, with a long staircase, so I nicknamed it a fairy-tale design. I designed it so that it would be easy to cut, and it returned us to the purple glow of my first lanterns. Of the three colours I have use to date (purple, blue and green), I think that this is my favourite. The gradient it creates is reminiscent of a beautiful twilight sky.
The post contains Amazon affiliate links to the products we used.
For Making Fairy Tale Mason Jar Lanterns You Will Need
- printable designs
- mason jars
- purple spray paint
- plain paper or black paper
- scissors & hobby knife OR silhouette cutting machine
- scotch tape & white glue
Watch the Video
Making Fairy Tale Mason Jar Lanterns
1 — First, prepare the jars. For a set, I usually use a couple of standard half-pint mason jars, a small jam jar and a big pickle jar. Before applying paint, wash them thoroughly. Whenever possible, finish washing with a bit of alcohol – it degreases the glass and removes any sticker residue or codes printed directly on the glass.

2 – Spray paint the outsides of the jar. I have tried both Krylon and Rust-Oleum, and the latter is my preference. It gives a good even coverage. Something you need to be careful about is to leave the jars translucent by spraying a very thin layer, not at all the way you would usually apply spray paint – more like a layer of deliberate overspray. Once the jars are dry, drop a candle inside one of the jars and see how the light comes through. If the light isn’t coming through, you may need to try again with a different jar. Let the paint dry thoroughly, according to the instructions on the can.
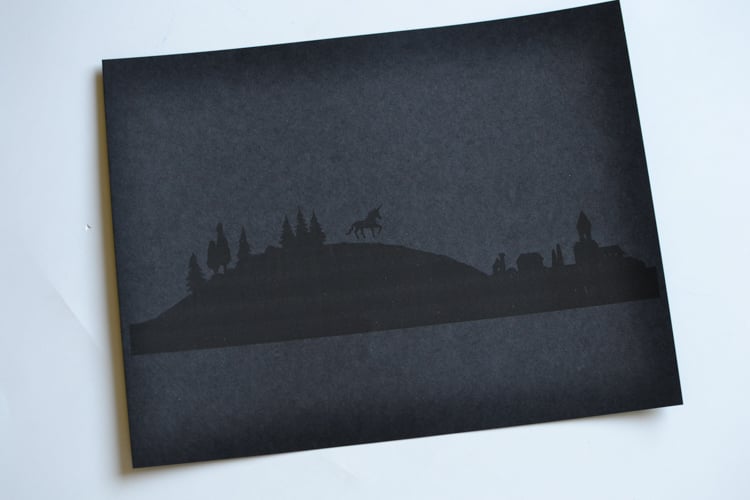
3 — While the jars are drying, you will need to print the designs. What paper should you print on? In the video, I use white paper for clarity. It works, however you would have to trim the design really closely, making sure that there are no excessive white edges. From that perspective, it would be easier if you printed the designs on a black sheet of paper. Then you don’t have to be as careful in following the design. It’s a little more difficult to see the design, but it’s not at all impossible. Check it out!
4 — Cut the designs out, using whatever cutting instruments you feel comfortable with. I used standard scissors, manicure scissors and a hobby knife. Manicure scissors are handy for cutting really intricate parts, like the unicorn, the fairies and the tree branches. A hobby knife is indispensable when it comes to cutting out windows and arches. You can see how I used each of them in the video.
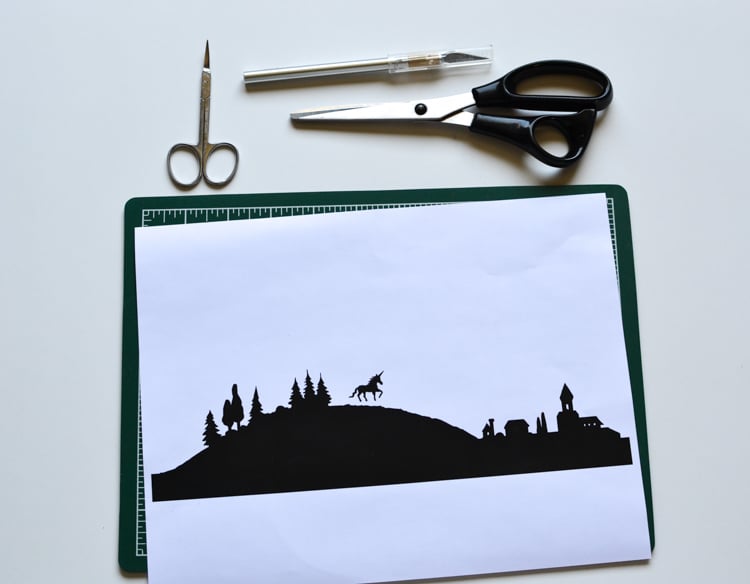
Of course, if you happen to have a silhouette cutting machine, use it! The design comes in JPEG format, but it’s easy to add to your library.

5 — Wrap the designs around the jars. Previously, I glued the designs to the jar, and they covered about 2/3 of it. This time I scaled them to the diameter of an average half-pint which is 27 cm. In other words, when printed, each design would be about 27 cm long + 1 cm of overlap, so that you could glue the ends together. If one of your jars is too small, cut the design down a little. If one of the jars is too large, you might consider not wrapping it all the way around – or you can print the same design twice and making a little addition like that.
There are a lot of different ways you can fix them in place! Use white glue, double-sided tape or simply tape the ends of the designs together. The fairies and the unicorn will have to go on with double-sided tape if you want to change their position or with glue if you want to attach them permanently.
6 — Insert the candles inside and enjoy! LED candles may be preferable if the lanterns are going to be around children or pets.
Light the Fairy Tale Lanterns Up!
When I made the first lanterns, my son was just a toddler, curiously exploring the light. He is almost five now. But he remembers them! As soon as I spray painted the jars, he started asking when we can light the lanterns up and take them outside. While I left the silhouette cutouts lying around, he came over and carefully played with them, moving fairies around and telling a story. Later, he shared it with me – the tale of a fairy who lived on the moon, lonely and sad, until she met another fairy.
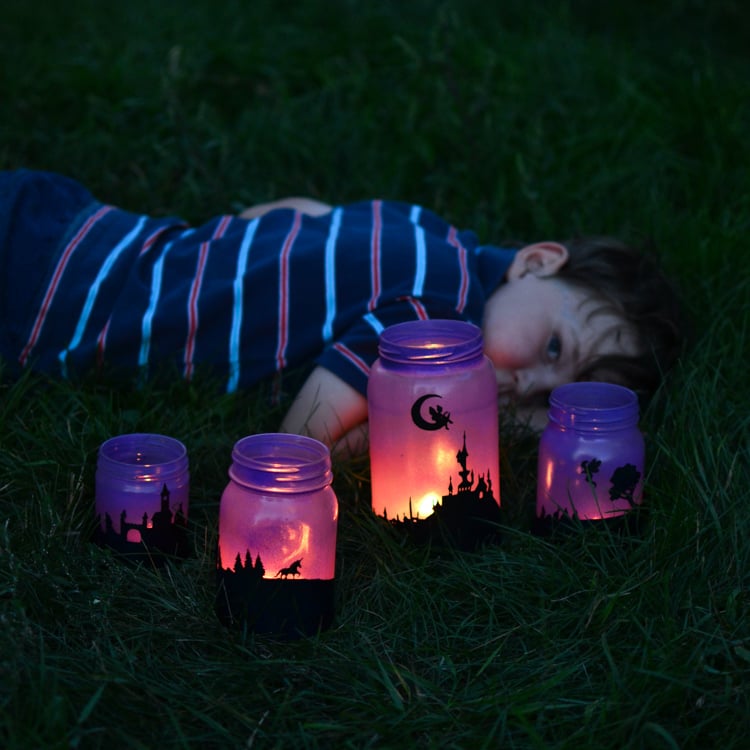
He told me the story as we took the lanterns outside and put them in our garden. They stayed on our patio table for a while as the sun set, but later Anselm asked me to take them down to the grass. It seemed right that the fairies should be lurking there. You can see how the qualities of the light changes as it gets darker.

Do you like making lanterns and luminaries? This is our latest project.
Also try:
If you want to stay updated on the new stories from Adventure in a Box, consider subscribing to our Facebook, Pinterest or Instagram pages. Thank you for reading!
Get the Printable Designs!


These the so beautiful,I really want to try and make them.I love all of your mason jars my grandchildren will love them. Thank you for sharing these x