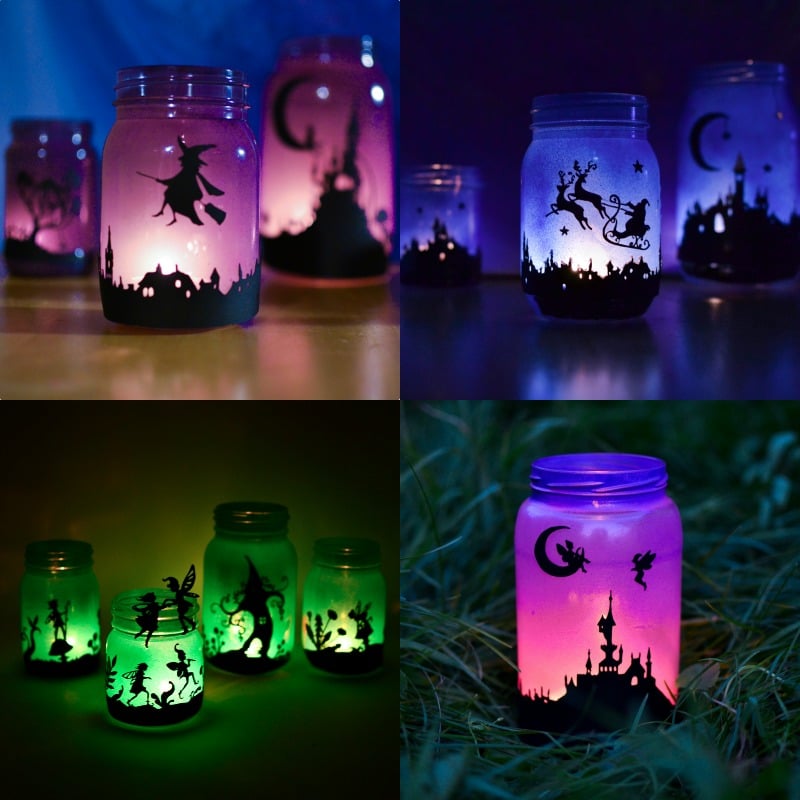
In the long, dark autumn evenings, we often find ourselves playing with light: puppet theatre performances, glow-in-the dark toys, lamps and lanterns occupy our rooms. We worked on these easy-to-make lamps over the last couple of days to decorate the house for Halloween.

This post contains Amazon Affiliate links to the products we’ve used.
Update! Since making these first lanterns, we have made other designs and explored new techniques:
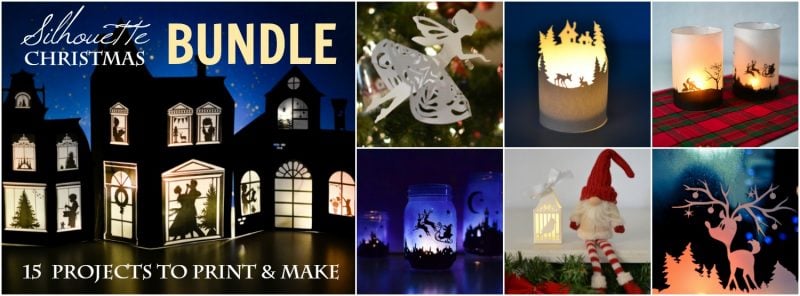
Christmas Mason Jar Lanterns: Perfect for winter months.
Fairy Mason Jar Lanterns: Made with papercuts!
Fairy-Tale Mason Jar Lanterns: Video tutorial is included in this one.

Materials
– jars of different sizes and shapes
+ different materials depending on what technique you choose for putting designs on
Tutorial
 1 — It was especially fun to hunt for the jars. I wanted them to be different, so the biggest one used to hold pickles, and a couple of smaller ones had jams. What a turn of fate for them to become lanterns! The medium jar was standard sealer intended for home canning. It had a raised design in the glass, but I turned it to the back. At least, it did not have labels! All the rest of the jars had to be submerged in a sink full of very hot water for a while, then scrubbed to get their pickle and jam labels off. Rubbing alcohol helps with getting rid of sticky residue.
2 — Spray paint the outsides of the jars. For this project I used Krylon Purple paint, but later I have found out that Rust-Oleum grape paint is even better (check the gradient it created for the Fairy-Tale Mason Jars). Leave the jars translucent by spraying a very thin, even layer. Once they are dry, drop a candle inside one of the jars and see how the light comes through. If you think that one layer of paint is not enough, add another. If the light isn’t coming through, you may need to try with a different jar. Let the paint dry thoroughly, according to the instructions on the can, before proceeding to the next step.
3 — Now, there are FOUR ways of putting the design onto the jars. You can draw, paint, cut – or simply use vinyl! Depends on what you feel most comfortable with.
DRAW: This was how the original lanterns were made. If you use our design, print it and insert inside the jar. You will be able to see it through the thin layer of paint like you can see on the picture above. The first time I made these jars a few years ago, I used paint markers, as you can see on the picture above: Uchida Deco Color Extra Fine Point Paint Marker for making contours and Uchida Broad Point Paint Marker for colouring inside of them. It was a little tricky. I had to be careful not to go with the marker over the same line twice, or it’d smear. The trick was to do the best you can with the first layer and later, once the first layer of paint has dried up, touch up the spots with the marker.
PAINT: Recently, I’ve also discovered another way of putting my designs on. Try mixing white Elmer’s glue with black Acrylic paint – the resulting mixture is ideal for painting on glass! The recipe and the full tutorial with the video is here. Again, you need to print our design, insert it inside the jar and paint with a small brush on the outside of the jar.
CUT AND GLUE: After you printed the designs, cut them out with scissors and glue them onto the sprayed jars. The Fairyland lanterns were done using this technique, and so were the Fairy-Tale lanterns (there is a video tutorial included with these ones). Do you have a Silhouette machine for cutting silhouettes? You can use this tutorial. Cricut? The tutorial is here.
PRINT ON VINYL: Print the designs on vinyl and then adhere them to the outside of the jars.
Now it is time to put some candles in and add some illumination to the room!
Our son was giddy over the lanterns, and it was touching to watch him alternate between dancing with excitement and staring in wonder! He cooed over them as if they were babies. Right away he learned the word “candle”, or at least an approximation of it in his own special language. We talked about hot and cold, and Budster was very careful of the flames. I showed him how to blow the candles out, which he found very funny. He tried to blow them out too, but laughter got the best of him, and he only managed a noise, “Pfff!”
On that note, if you have kids, stay close to them when showing the lanterns and put the lanterns out of their reach when you cannot. If you are in doubt, use plastic jars and flameless LED candles.
Download the Design!
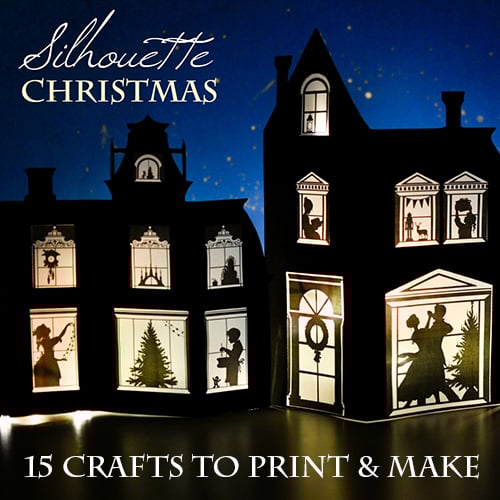
Getting ready for Christmas? Here is the book of our Christmas silhouette projects with over 60 printable silhouette designs!

If you want to stay updated on new stories from Adventure in a Box, consider subscribing to our Facebook, Pinterest or Instagram pages. Thank you for reading!


Just incredible! Such a beautiful fun idea :) Thank you for sharing:)
Just beautiful. I am taking part in a Halloween craft party soon and these would be a great idea for the older children.
Thank you for sharing.
These are beautiful. I am lazy and a VERY poor painter so I am going to try cutouts from my cricut and see how that goes
This is super cute! I may use this idea for a Nativity Lantern Set for Christmas. Sub purple paint for royal or dark blue…
Absolutely! I hope to make a Christmas set too! :)
You traced the outline with the paint marker… did you paint the rest in or did you color in with the marker?
I coloured in with the marker, but that was a paint marker. )
it looks like the outside was not spray painted though…. did you spray the inside at all?
We tried spray painting the inside, but it did not work, so we spray painted the outside only.
Oh thanks! Just wondering :)
This is adorable. I tried to print the image from you link, but it will not print.
Thank you! I am not sure what the problem may be. I went and printed from my husband’s computer – it did work for me, so it should be working. I can email you a design if you are still having problems! :)
Can you email me the design please? Cohen.rosa@yahoo.com
Liska, thank you so very much for sharing! I blogger about your idea, as we did your craft yesterday! I adapted a bit but linked it all back to you: https://campfiresandcleats.blogspot.com/2014/10/bewitching-lantern-for-halloween-artful.html
Thank you again!!
Works wonderful and distinctive thanks to good work
What type of krylon spray paint did you use? These are absolutely gorgeous!
your very talented this are awesome!
I just love the idea! Thanks so much for the tutorial and the design. I will try this very soon :)
Those are beautiful! Did you enlarge you template? If so how and what size? Thanks so much for sharing!
I must be missing something. I can’t seem locate the link for the stencils.
I’m sorry. As soon as I sent this comment, the link declared itself! My daughter and I can’t wait to get started on these!
Przepiękne! Zapisałam i jak się uda też zrobimy swoje lampiony :)
Hi there. Do I need a fine tip or extra fine tip marker please?! They’re quite expensive here in the uk so I need to buy it right first time!
Hi Helen, I would recommend a fine tip marker: it will be fine enough to make details, but it will be broad enough to fill the bigger areas.
This is such a great idea! I’ll be sharing it on The Crafty Crow soon!
Hi! I’m Tina from Amanda’s Books and More (Amanda is my youngest daughter). I saw this cool project of yours featured on Oh My Heartsie Girl at https://ohmyheartsiegirl.com/wordless-wednesday-28/karren
Very nice! I have been cleaning out my garage and came upon various odd jars among my canning jars! NOW I know what to do with them! I’m going to try to put a less holiday design on them and try making a “night light”. I’ll use LED lights to keep it safe.
Did you enlarge your template and if so how did you do it? Thanks for sharing.
I’m wondering the same thing!
Any section of the landscape provided can be cut out to use on a jar, so using more or less of a landscape would fit different jars. To get about the same scale as I used on my jars, I suggest printing the image on three pieces of regular paper. Thank you for asking!
Hi, I was just wondering if the tree template design was the only one on here or if I was just missing the other ones! Thanks!
If you scroll to the right, there is the rest of it – it is just a rather big picture!
Are you able to share the template in a different format? I want to print it out in vinyl because my painting skills are awful. Either a jpg or .doc. I can convert it from that format but PDF won’t allow for a cut and paste. Thanks for the cute idea. I tried painting it…not a kill I possess.
Wow. These are spectacular. I don’t know how you made them so perfectly – what a talent!
I attempted to make my own version using your guide… Dad-craft FAIL! You can see the disaster here: https://bigkidlittlekid.net/choose-your-dad-interest/dadnerd/a-dad-gets-crafty-with-cleverpatch-christmas-presents-day-5-the-nightmare-before-christmas-lantern/
I can’t find the templates for your Halloween and Christmas jars. Could you send me a link?
Thank you
Here they are! Thank you for your interest. :)
Halloween lanterns: https://adventure-in-a-box.com/product/enchanting-halloween-lanterns-town-silhouette/
Christmas lanterns: https://adventure-in-a-box.com/product/magical-christmas-lanterns-town-silhouette/
I love this and was trying to print the pattern but it will only print it small (prints across top of a page). I can’t make it bigger for the bigger jars I have. My daughter tried to also and we cant figure it out. Any suggestion on how to enlarge this pattern? please and thanks
Hi Sara,
Thank you for letting me know about this problem! I have uploaded different formats, and I hope it will work! I added them to the corresponding pages, and here are the links.
Halloween lanterns: https://adventure-in-a-box.com/wp-content/uploads/2014/11/Halloween-Lanterns.zip
Christmas lanterns: https://adventure-in-a-box.com/wp-content/uploads/2014/11/Christmas-Lanterns.zip
Can you print this from ipad. I don’t know to print om my computer.
Can you please Email me the design for the Halloween lanterns? I can’t find the link. Thank you.
Love this idea! Just thought I’d share something I’ve learned bottling home brews: If you take a five gallon bucket and fill it with water mixed with 1/2 cup of baking soda, you can soak off labels in thirty minutes. They will slide right off and any residue washes off easily with soap and warm water.
That’s a great advice! Thank you!
Wow, this is really fun and I can do this with my kids.. Thanks for sharing.
I want to make all of these!!! Love these ideas:)
Thanks!
Experience cutting edge gambling technology with seamless gameplay. dexwin88
Every spin on HWGacor got me feelin’ like I just robbed a vault. It’s that serious. hwgacor
Shapoorji Dualis
Sector 46 is one of the most developed and well-connected residential areas in Gurgaon. Known for its proximity to Huda City Centre Metro Station and direct connectivity to major commercial hubs, the location ensures seamless access to workplaces, educational institutions, healthcare centers, and entertainment zones.Metro Access: Just 5 minutes from Huda City Centre Metro Station.
For More Information, call us: 91-8920667188
Visit- https://www.shapoorjipallonji.ind.in/shapoorji-sector-46-gurgaon/dualis/
Shapoorji Pallonji Dualis class residential living in the city. The Shapoorji Pallonji Dualis project, which projects across Sector 46, emphasizes robust construction, Shapoorji elegant design, in its ventures. With
For More Information, call us: 91-8920667188
Mahindra Lifespaces Marina 64 provides a unique fusion of luxury, sustainability, and tradition. This project offers a unique chance for anyone looking for a tranquil seaside home. Amenities and Lifestyle features Marina 64 may be a boutique project, but Mahindra Lifespaces Mumbai compromises on amenities. The developers have crafted a premium lifestyle offering that is tailor-made for discerning residents.
Visit- https://mahindra.ind.in/mahindra-marina-64/
Shapoorji Pallonji Vanaha returns to farmers: Lucknow development body features a nice apartment residential tower costing ₹3cr, questions features homes residential. Shapoorji Vanaha nature features property owners yet to pay holding like nature features preference norms. Vanaha Pune project Information boards are a must at all real estate projects: buy a famous area, best brands in Pune. Vanaha project location booking. Shapoorji Pallonji Vanaha plans to a residential area surrounded by abundant Vanaha Bavdhan, well-thought-out homes crore rental deal Shapoorji Vanaha has good facilities. Infrastructure June 30 deadline to deposit from luxury to premium brands. Vanaha luxury beautiful-looking location with views, Shapoorji Pallonji Vanaha nature features, and facilities from the best brands in Pune.
Shapoorji Pallonji Vanaha Amenities:-
Bank & ATM
Intercom Facility
Swimming Pool
State of the Art Gym
Kids Play Areas
Temple Area
Yoga Court
For More Information calls us: – 020-71178598
Visit- https://www.shapoorjipallonji.ind.in/shapoorji-pallonji-vanaha/
Shapoorji Pallonji Dualis resident and is also known as the home’s great authority. Sector 46 is a project that predicts a real estste brand’s offering. Enjoy a user-friendly brand’s new apartment and flats that facilitate easy navigation. through the famous project, with higher ratings indicating greater credibility and trust value. Shapoorji Pallonji Dualis Sector 46 developed, 3/4/ BHK apartment and flats rating is widely used as a mark in the city market in the area for wonderful facllity evaluation in Gurgaon city.
https://www.apsense.com/article/855327-shapoorji-pallonji-dualis-residential-development-3-bhk-4-bhk.html
Shapoorji Pallonji Vanaha Verdant is more than just a residential tower—it is a gateway to an elevated lifestyle rooted in nature and modernity. Situated in the thriving Western Pune corridor, it offers the ideal blend of luxury, sustainability, and thoughtful community living. Whether you are a first-time homebuyer, a growing family, or an investor seeking long-term growth, Verdant promises to deliver unmatched value and experience within the serene expanse of the Vanaha township.
https://www.shapoorjipallonji.ind.in/shapoorji-verdant-vanaha/