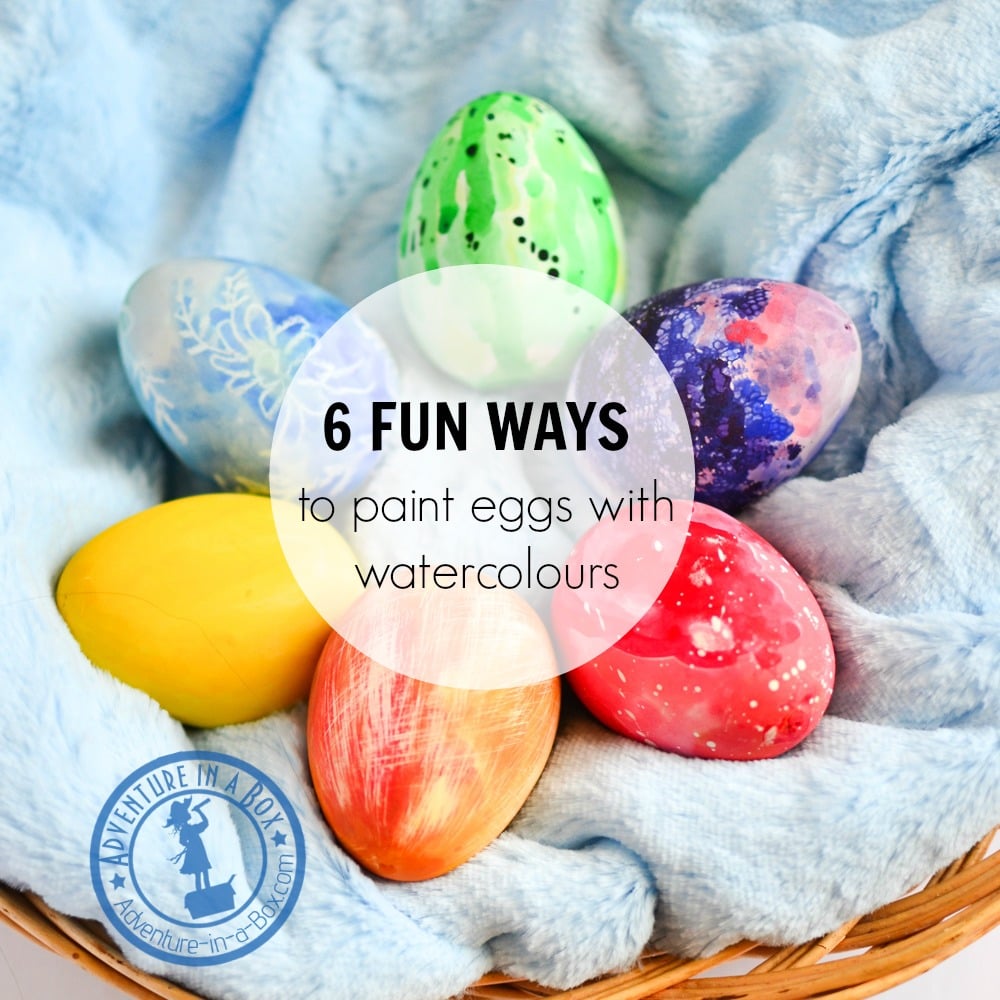
In the past, we have tried painting wooden eggs for Easter, but this year I saw blank plaster eggs in the store. Budster, with his fondness for birds, was immediately fascinated by them too. When I told him we could paint the plaster eggs, he was delighted, so we took a few back home with us for an experiment.
What we used:
- 6 plaster eggs (we bought ours at a dollar store for $1.25 per egg)
- liquid watercolours (good old watercolour pans work, too)
- (optional) transfer pipettes, white wax crayon, sand paper
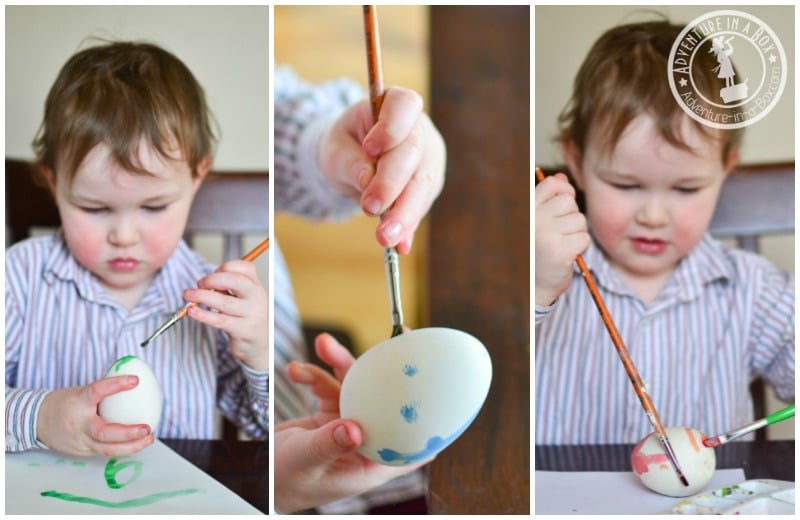
After a few “Mommy, are we ready to paint them yet?”, while I was cleaning the table, we sat down to work. The sets of eggs we bought came with a few little tubes of tempera paint, but we were curious about trying our liquid watercolours on them. One of the defining properties of plaster is its ability to absorb water, so combining it with watercolours promised to be interesting.
Indeed, the surface of the plaster eggs dried almost instantly, leaving a nice even stain. So, after painting a couple of eggs with solid colours, we became daring and tried a few experiments.
Dripping Paint

This photo is a good illustration of how quickly paint could dry: we would let a drop of watered-down paint run from the top down the side of the egg. It would have scarcely reached the middle when all the water would be absorbed. As the water absorbed, the pigment would become more concentrated, leaving a gradient effect.
If we had a dropper, it would have been fun to try it out and for Budster it could have been a new skill to practice, but as we couldn’t find ours, we just used the tip of the brush.
Aging Effect
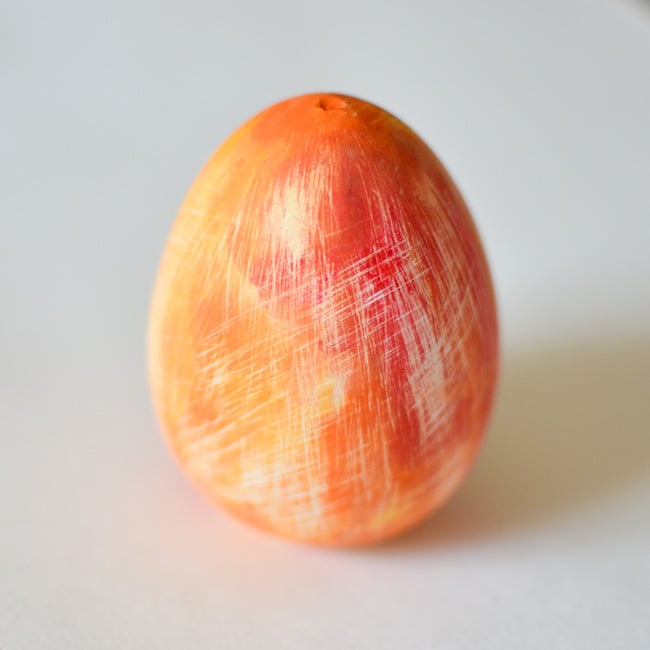
Watercolours are known for their transparency. The layer of pigment is very thin, so we could remove it by scratching the surface of the egg ever so slightly with a sheet of sand paper. We found it out when I wanted to redo a part of the egg and tried to clean it… That didn’t happen, but we ended up with an interesting aging effect. Good if you care for a vintage look!
Spraying Paint
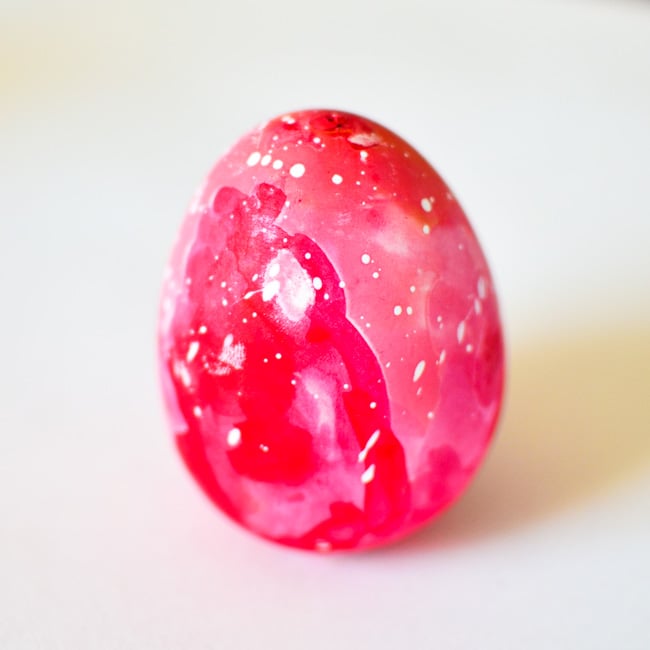
Spraying diluted white paint is an old trick, but it looks so effective that I can seldom resist it when making abstract backgrounds. We took white paint out of the tubes that came with our eggs, but any tempera or acrylic paint would do. Just flick the brush, but keep your face out of the way!

The same can be done with any other paint. The trick is identical, but the effect is slightly different. If the red egg looks like a faraway galaxy with white stars scattered all around, this green one is more like a speckled dinosaur egg.
Wax Resist

Another old trick that is as close to magic as a three-year-old can imagine. Use a white wax crayon to put the invisible design onto the egg, then go over it with a brush and see it appear. We tried a Stockmar crayon and a Faber-Castell gel stick, both with satisfying results.
It was such an enjoyable experiment that we had to put the eggs away and write each other secret messages for a while.
Lace Resist
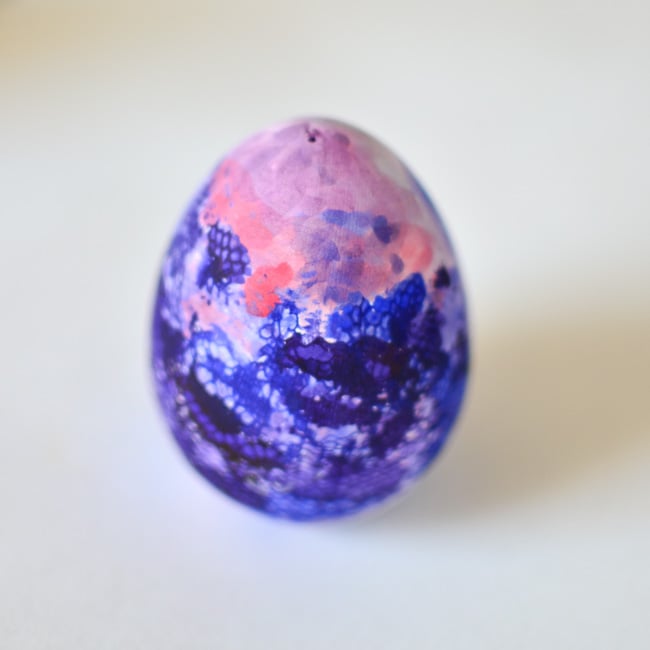
We were running out of eggs, so the last experiment we did involved an old piece of lace. We wrapped it around the egg and painted on top of it. The lace absorbed paint, so the concentration of pigment was higher where it touched the surface of the egg. So when we took the lace off, we saw that the texture pattern transferred onto the egg.
All six of our eggs were done!
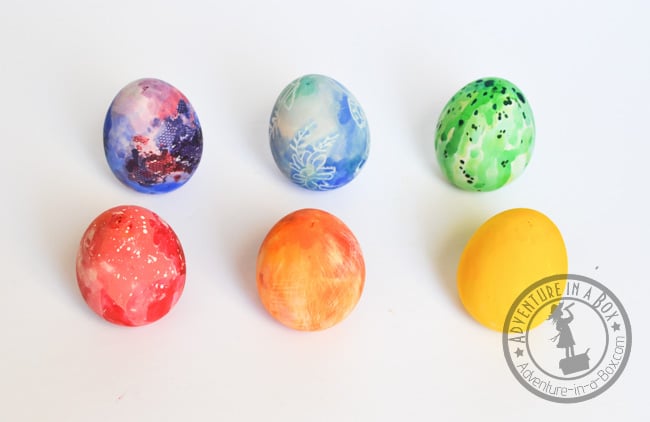

While the results of our painting session wouldn’t win any awards, we enjoyed experimenting with watercolours and observing the various effects. Plaster added to the uniqueness of the experience, but you could try all the same techniques on real eggs. Share your results with us – we’d be curious to know how it works out!
If you want to stay updated on new stories from Adventure in a Box, consider subscribing to our Facebook, Pinterest, Twitter or Instagram pages.