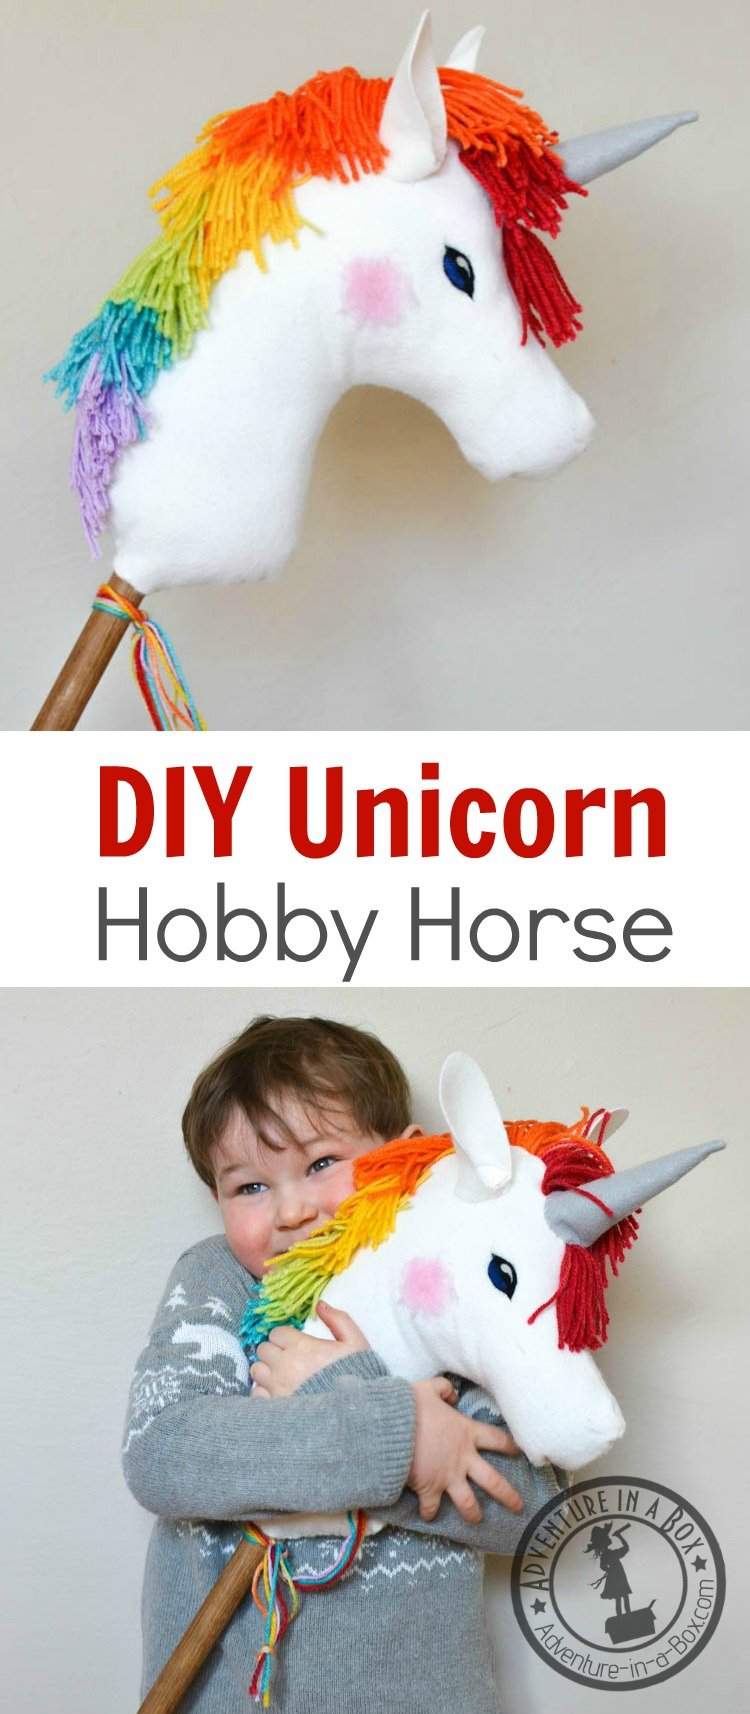
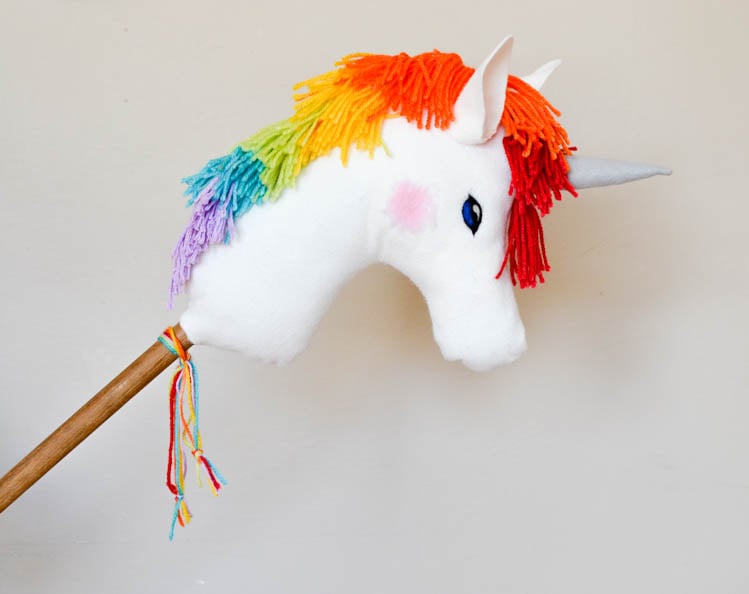
Making a rainbow unicorn hobby horse is a sure cure against February gloom!
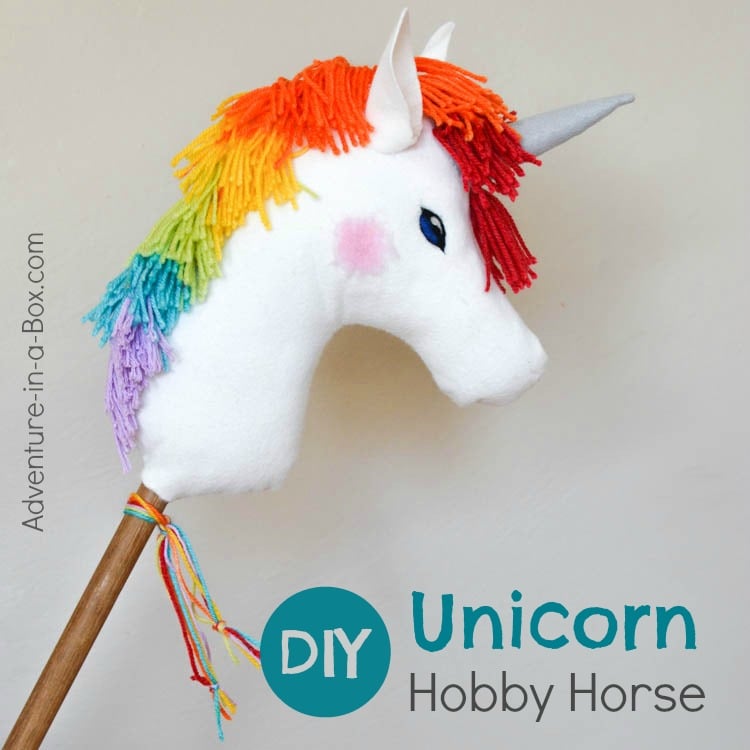
I have a few certain weaknesses. Chocolate. Moss. Lemons. Rainbows. When I am feeling positive, I call them my secret ingredients. If there is a way to squeeze them in a project, I won’t miss a chance. And there are times when I will build a cake – er – a project around my longing for dark chocolate. That, unfortunately, happens more often than I’d like to admit! February is a trying month. The need for something bright and cheerful is at its height. Having made a couple of chocolate cakes already and not expecting moss to show up for the next couple of months, I put my hope in rainbows. Not that I expected to see them around here in February, but I could certainly make some.
It’s hard to note the time a certain creative idea came up. I’d say that one moment I was watching the kids play, and the next moment I had an idea for a rainbow-maned unicorn. That’s the short version of the story, anyway. The long version was taking place in the back of my mind.
I was remembering cleaning the toy box the other day and finding the dinosaur hobby horse that we made for Anselm. It was a happy project, and I thought how nice it would be to make another hobby horse for Faye. Now what could it be? Sometimes I think that of all kids, ours must be the least interested in stuffed toys. I can’t say I regret it most days, you know, not having to pick them off the floor all day long (I pick up wooden blocks and LEGO instead). But when there is a prospect for a new stuffed toy – or at least a half stuffed toy since a hobby horse also has a wooden part – I do enjoy considering the addition carefully.
A hobby dragon was my first thought. We sure love dragons. But a dragon would be pretty similar to the dinosaur we’ve already made. To be honest, Anselm told me it was a dragon, so there was no point adding another one! That imaginary play plot had already been covered. A horse was another possibility. One needs a horse to fight a dino-dragon. But I have no experience with horses, and that makes a project less exciting. “Well, what about a magical horse?” I thought.
And that’s when the unicorn pranced though my mind. He had a rainbow mane. Definitely a rainbow mane.
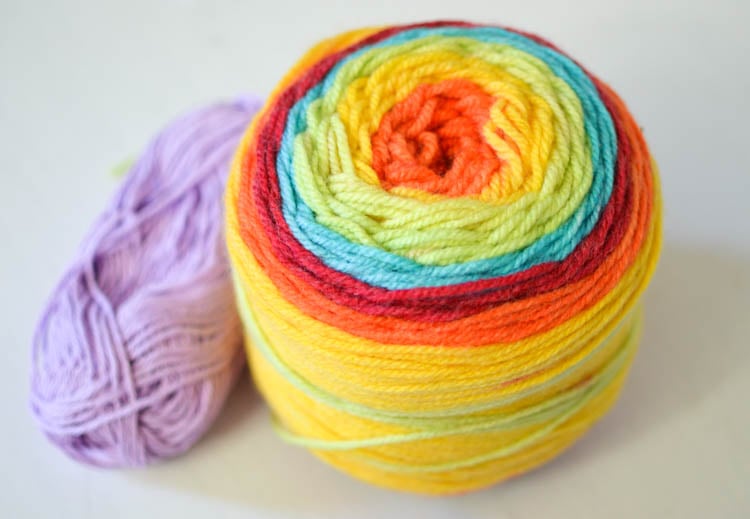
The next day, I went to the craft store looking for yarn. I thought I may have to buy six colours of yarn to make the rainbow mane, and I was a little doubtful about that since I don’t knit or crochet. But I got lucky! Almost right away, I found a ball of thick rainbow yarn. The colours matched well, being in a ball together, and it was divinely soft! It didn’t include purple, but buying one extra ball of yarn wasn’t a problem.
This post contains Amazon affiliate links to the products we used.
Like its predecessor, the dinosaur, this unicorn was one of our happy projects. Since Jeffrey makes a living by building metal helmets to fit custom heads, he’s better than me at figuring out patterns, so we ended up working on it together. It was a lot of fun. As a matter of fact, he laughed half of the time we were making the beast.
The kids enjoyed participating in the crafting process as well. They kept stealing the unfinished unicorn, so his head fell off the stick at least half a dozen of times before it got glued to it. They also didn’t really care about finishing it once the mane was done, so it took a lot of persuasion on our part to keep the unicorn from going away without his horn, ears and eyes.
It’s also worth noting that approximately halfway through the project, Anselm confided to me that he wants to have this unicorn for himself, and Faye can have his dinosaur. He seemed relieved when I said that they can both play with them. So they did. Rather differently!
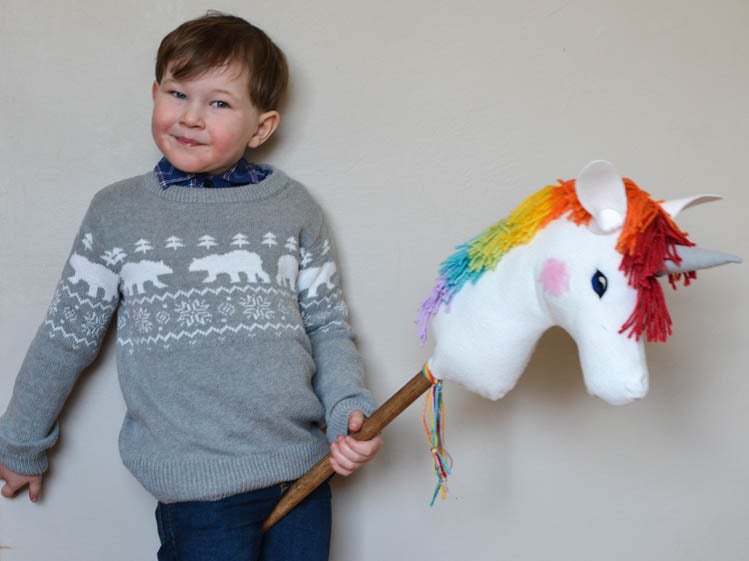
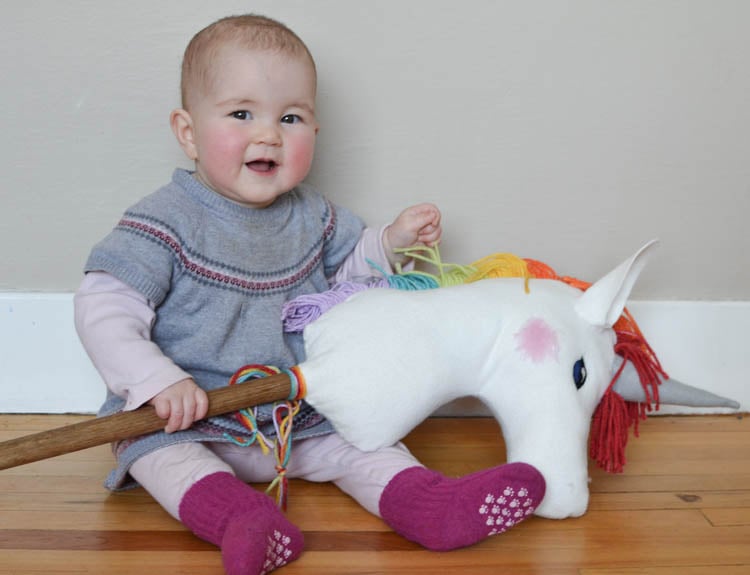
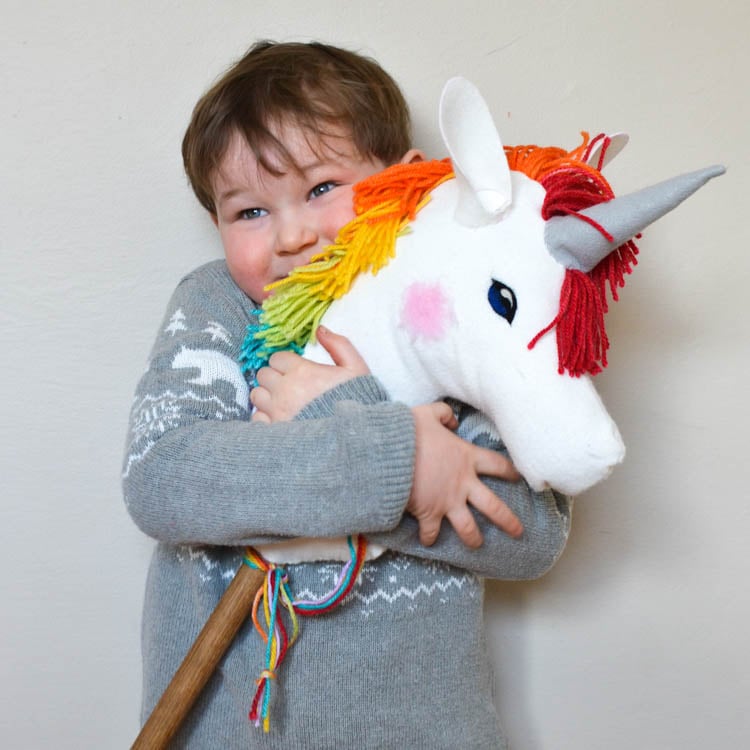
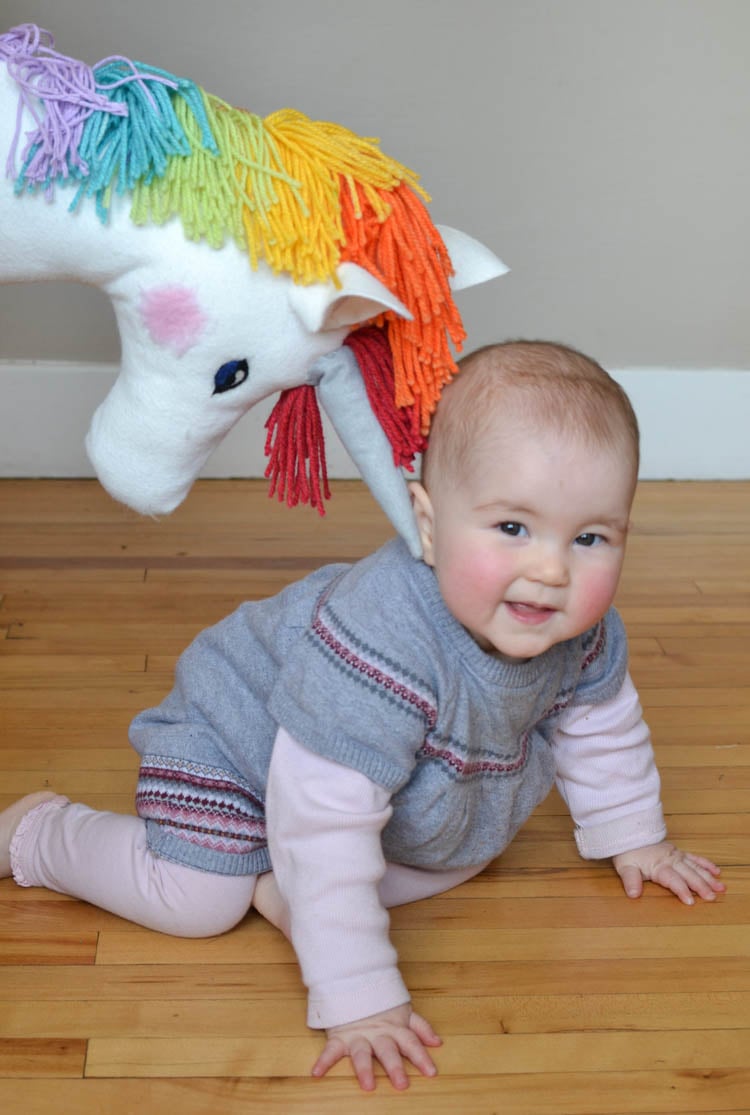
Faye brushed the unicorn’s mane, and Anselm rode it. Faye thought that the horn was great for being tickled with, and Anselm used it for helping him check what was hiding on the top of the shelves. The magical beast was put to good use, and he worked great for bringing some colour into our crafting and playing. Honestly, such a silly looking creature, but such a happy one!
Materials for Making a Unicorn Hobby Horse
- thick yarn (either six balls or one rainbow yarn ball: this is the one we used, and this is another good one)
- white & grey felt
- polyfill or wool for stuffing
- (optional) dyed wool rovings (absolutely love this package: 36 small bags of wool, each a different colour, work just great for adding just a few details to felt projects!) & felting needle
- hot glue gun
- 7/8″ or 1″ wooden dowel rod (cheaper in hardware stores, but here is an example)
Download the printable pattern here!
How To Make a Unicorn Hobby Horse
Mane & Head
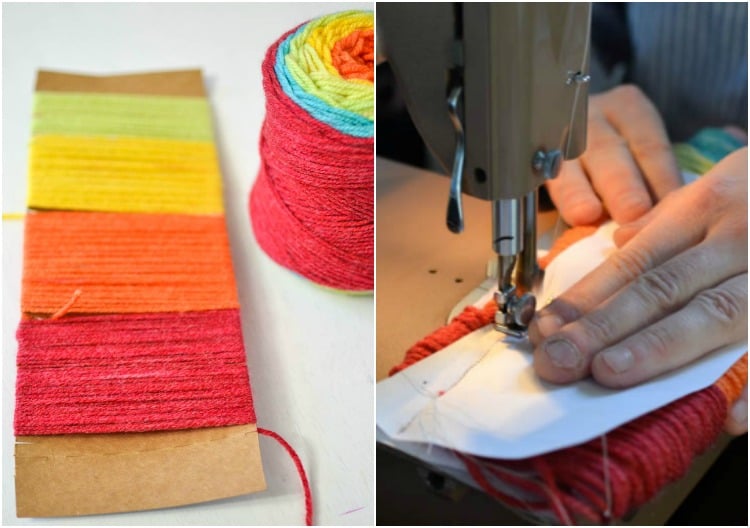
We’ll start with a mane. Decide how long hair in the mane should be (~4″) and cut a strip of paper this wide. The length of the strip should be equal to the overall length of the mane (~16). Choose thin paper because you’ll need to sew through several layers of it later.
Lightly wrap yarn around it in layers of colours. We decided that each colour would only occur once, but you can make them repeat if you like.
Once done, sandwich the mane between two more layers of paper and machine stitch through all the layers, about 1/2″ away from one side.

Cut through the yarn on the opposite side from where the stitch was made. You’ll get a long strand of hair. Want to make a wig?
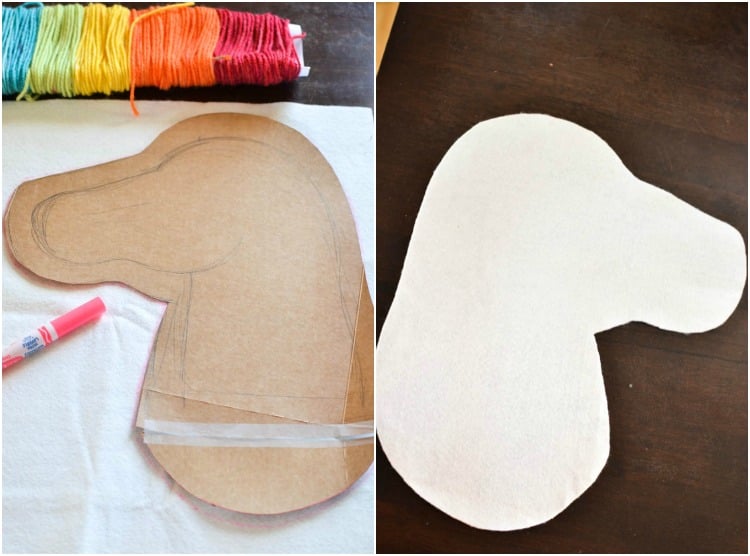
Now, for the head. Trace the pattern twice on a piece of white felt and cut two sides of the unicorn head out. If your fabric has an obvious front and back, do not forget to flip the pattern when making the second half.
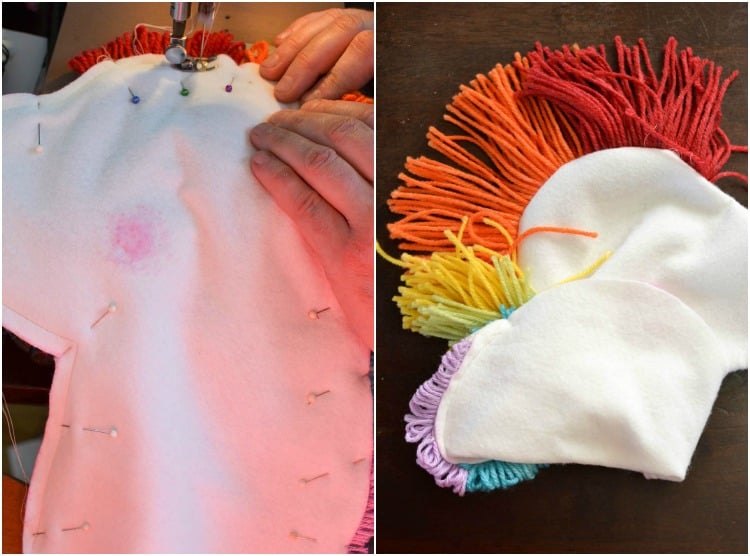
Pin the halves together inside-out, with the mane sandwiched between and with the long part pointing inward. Sew them together, leaving a small opening at the bottom to turn the unicorn right side out and stuff later.
Stuffing the Unicorn
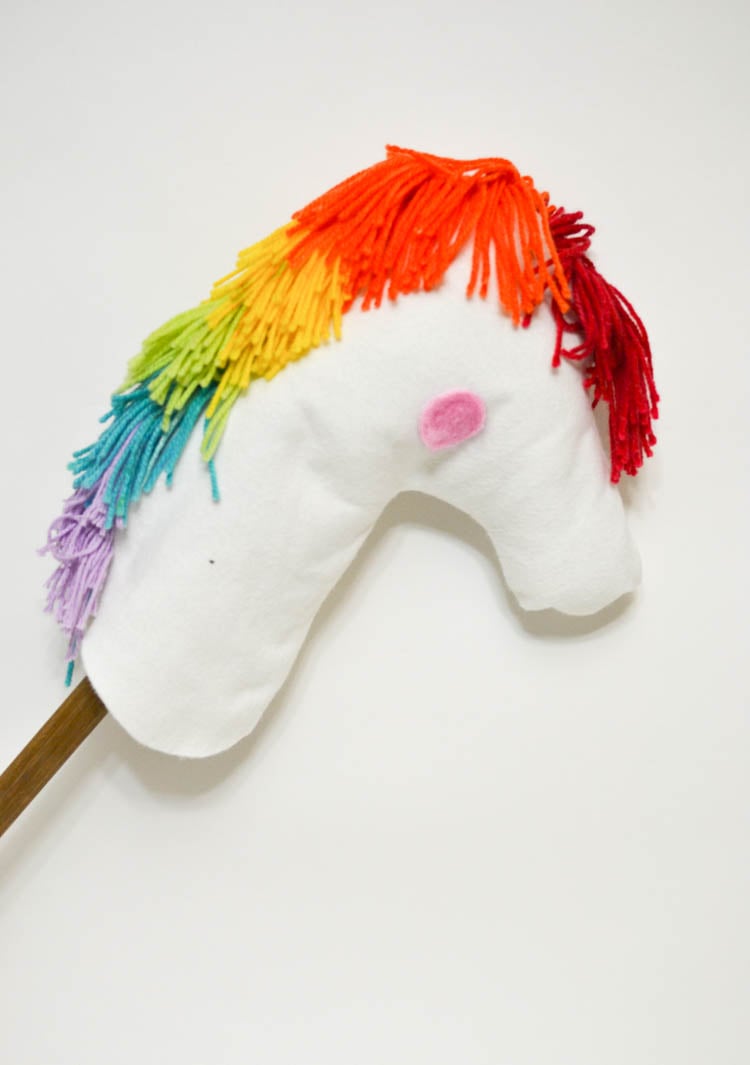
We used polyfill to give the head its general shape, then added small pieces to make sure that it’s well packed in the cheek and forehead areas. Fill the head first, then insert the dowel and pack stuffing around it until the neck is full. Once the unicorn is stuffed and the dowel is in place, hand stitch it closed and glue the rod in with a hot glue gun.
Horn & Ears

Cut the horn pattern out of grey felt, then sew it into a cone and turn it right side out, Stuff with a bit of wool or polyester stuffing. Stitch it into place in the centre of the forehead, pushing the mane out of the way.
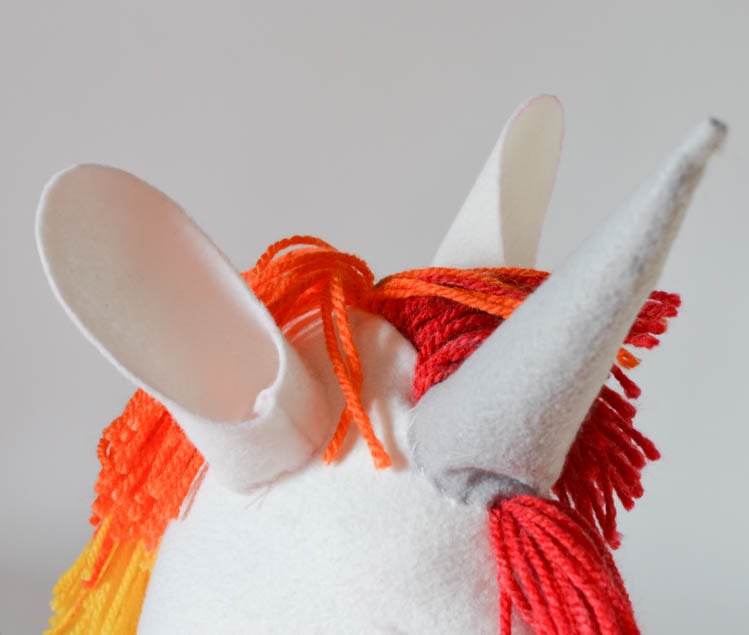
Cut two ears out of white felt. First sew the fabric into the ear shape, as shown on the pattern, then sew them onto the head.
Eyes & Cheeks
You can paint cheeks and eyes with a marker, or forego the former and make the latter out of buttons. There are really quite a lot of ways to do it! I tried needle-felting last year and fell absolutely in love with the process, so I used my felting needle to add some colour to the cheeks. I did it in the beginning, but I actually found it easier to felt onto after it was stuffed, so I recommend doing it at this point.
Needle-felting is very simple. You take a little bit of wool and work it with a needle until all the fibres intertwine and form a three-dimensional object. Working it into a piece of felted wool (or acrylic felt, for that matter!) is even easier because you have a base and you are creating a flat applique instead of a three-dimensional object.
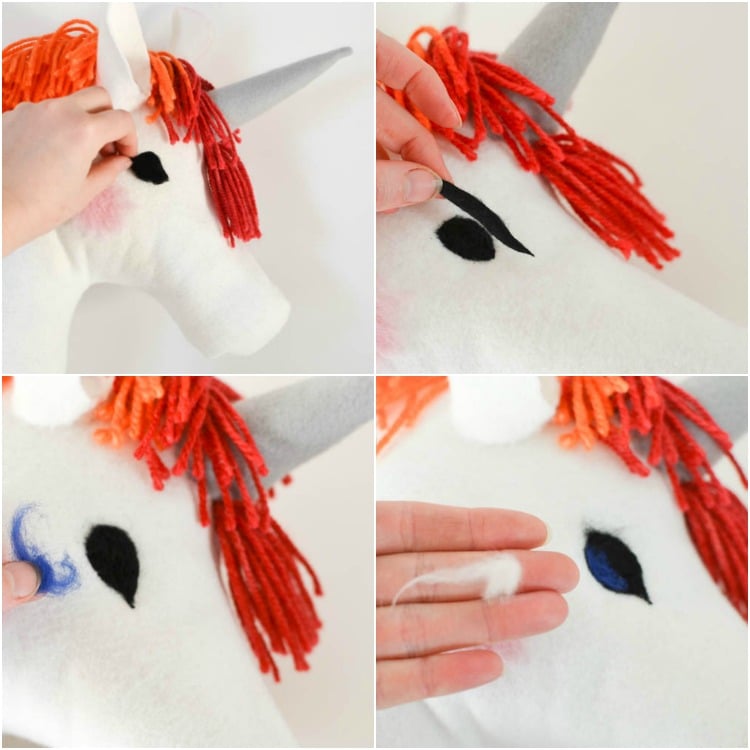
This is how the eyes were made. First, roll a ball of black yarn. Needle-felt it into the surface. Roll a thin sausage of yarn and carefully needle-felt it at the top of the eye, giving it an opal shape. Add blue at the bottom, then white at the top. Now, the unicorn looks alive!
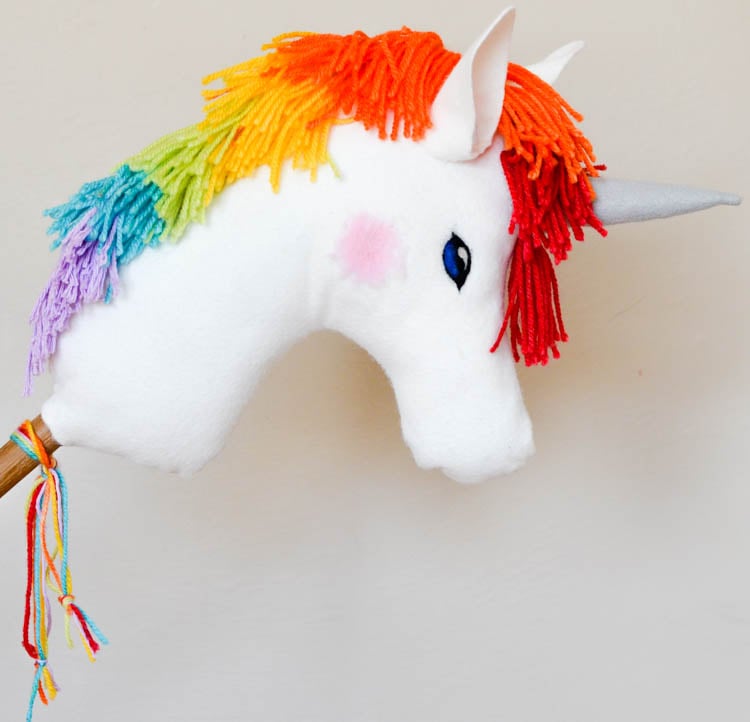
Please, share your happy projects with us on Facebook or Instagram!
