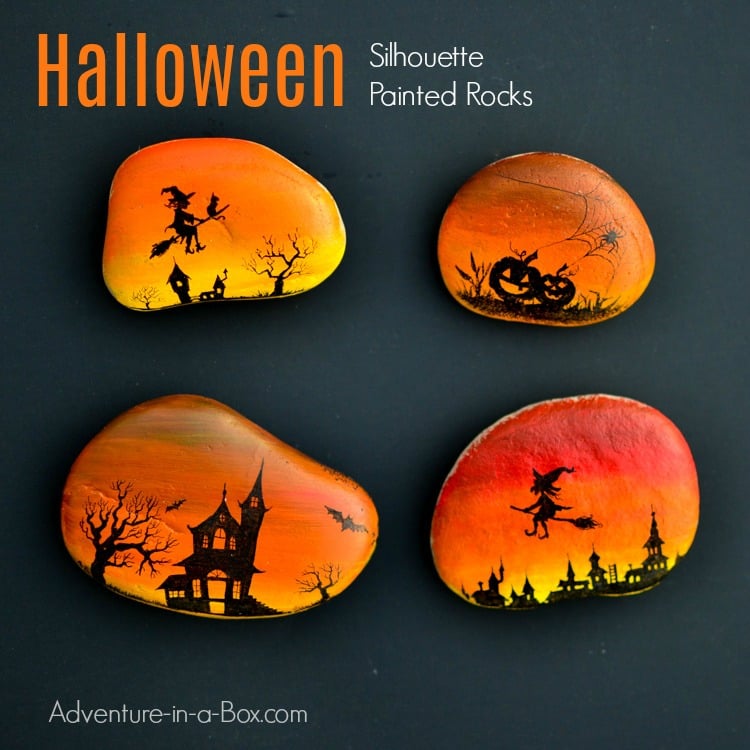
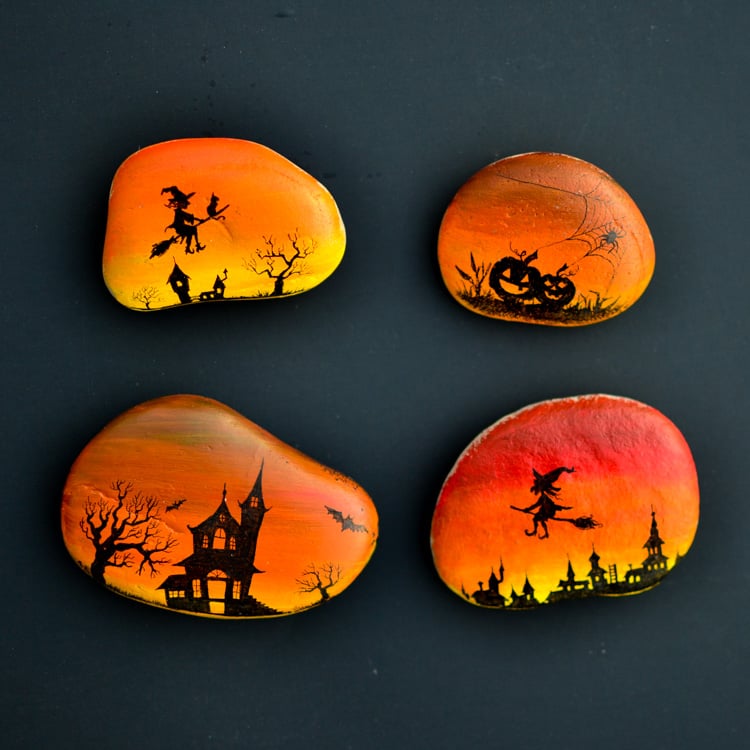
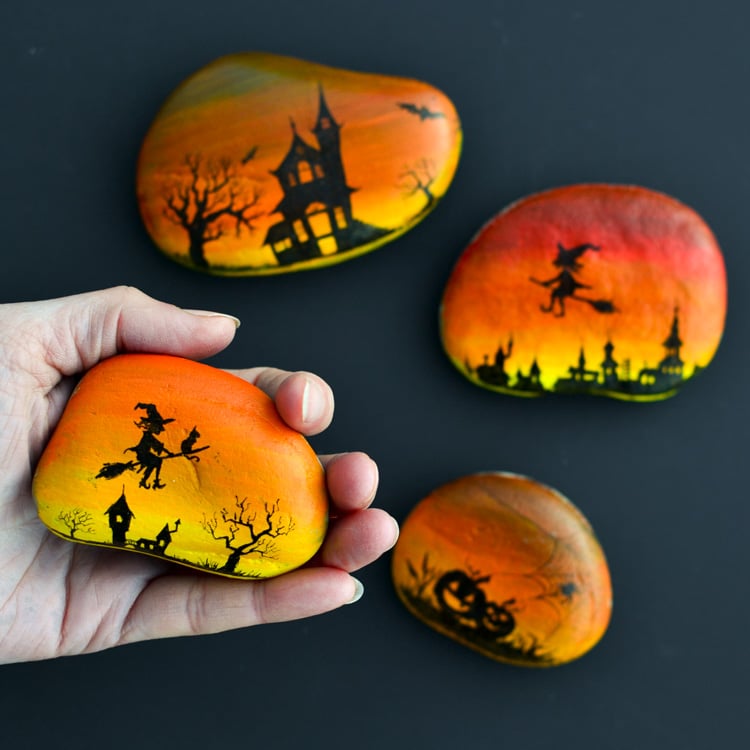
Make magical Halloween painted rocks using our free printable silhouette templates!
This has undoubtedly been a good year for all the rock painters. The new trend of painting and hiding rocks this summer has inspired a lot of fun rock creations! The summer is over, but it doesn’t seem like rock painting enthusiasts have given up on their hobby, not even in our northern city. So I made a few new autumn designs.
These rocks continue the fantasy silhouette series I made a few months back – with unicorns, fairies and castles. Except this time, somewhat spookier creatures insisted on being present – witches, spiders and jack-o’-lanterns have come to inhabit the paintings!
Materials for Painting Halloween Rocks
- rocks: the ones found in nature are best since the store-bought ones are often too polished for paint to stick. If you do buy rocks, you might have better luck using heavy-body acrylics
- acrylic paints
- copic ink markers/sakura ink pens: I find them very useful whenever I do any painting or drawing. If you don’t have any, you might want to start by getting two or three pens. 005 is a useful size for very fine details, 01 or 02 is good for general outlines, and 08 is tolerable for covering big surfaces. Obviously, when you’re working on a rock, it’s all pretty small scale. While working with pens allows me to add fine details, it is also possible to make silhouettes with black acrylic paint, thinned with water and applied with a fine brush.
- sealant, like outdoor spray varnish: It is essential if you plan to hide the rock in nature, but if you make it as an indoor decoration like a paperweight, it’s optional.
- (optional) silhouette designs at the end of the post (you can read about how to transfer them onto rocks – minimum drawing skills are required!)
How to Make Halloween Painted Rocks
1 — Paint the gradient of the sky at sunset. For these rocks, I’ve stuck to the orange colour scheme, in honour of Halloween. Start with brown-orange at the top of the rock and paint a little further than where you want this colour to end. Immediately, without letting it dry, start painting with the next colour, bright orange, below, making sure that the two are blending together where they overlap. Then add the next colour, yellow. Add a little bit of white at the very bottom.
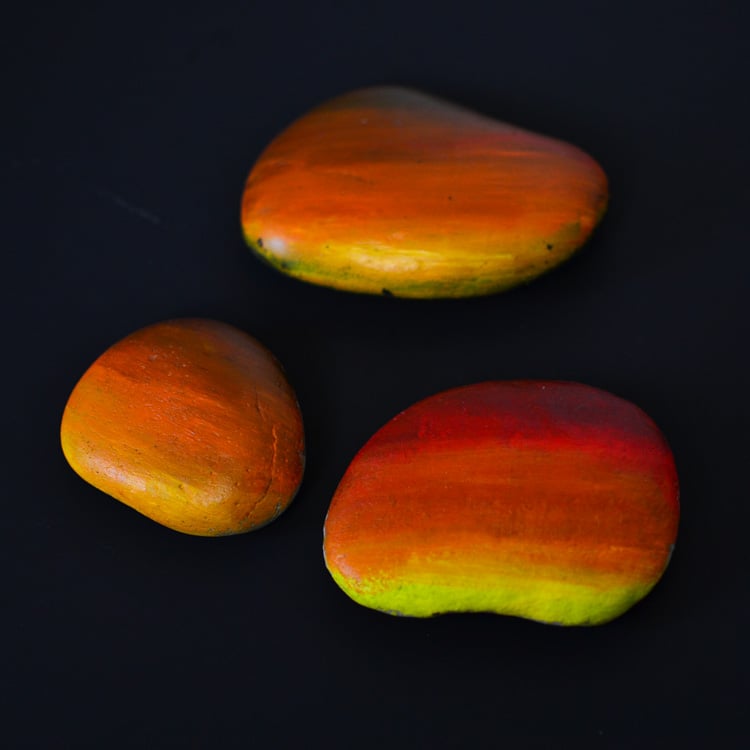
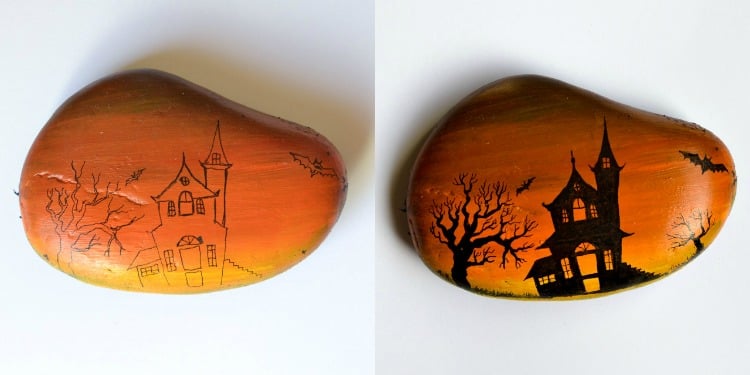
2 — Let the rocks dry completely. With acrylics, it can take a couple of hours. Once the rocks are dry, you can use ink pens for drawing silhouettes on them. I did freehand drawing, but there is a really easy technique for transferring designs onto rocks using carbon paper. You can check my tutorial on how to do it here.
You can see that I would draw outlines first, then colour inside and sometimes add more details with the thinnest pen later.
3 — Spray the rocks with outdoor varnish if you plan on taking them outside!
More Halloween Crafts


Thanks for reading! If you make our pumpkin rocks, share them on social media (Instagram or Facebook) and tag me @adventureinabox!


These are so cute and a great activity for children and scouts.